Enhance Your Home's Energy Efficiency with Window Weather Stripping: A Complete Guide
If you're looking to make your home more energy-efficient, window weather stripping is a great place to start. This simple addition can help seal up gaps around your windows, keeping your home cozy in the winter and cool in the summer. Not only can it help lower your energy bills, but it also contributes to a more comfortable living environment. In this guide, we'll cover everything you need to know about window weather stripping, from the types of materials available to tips on installation and maintenance.
Key Takeaways
- Window weather stripping seals gaps to improve your home's energy efficiency.
- Different materials like foam, rubber, and metal each have their own pros and cons.
- Choosing the right weather stripping depends on factors like cost, durability, and your home's specific needs.
- Proper installation and regular maintenance are key for effective weather stripping.
- Combining weather stripping with other energy-saving methods can further enhance your home's efficiency.
Understanding the Importance of Window Weather Stripping
How Weather Stripping Improves Energy Efficiency
Weather stripping is super important for keeping your house cozy. It works by blocking those annoying drafts and stopping air leaks. This means your HVAC system doesn't have to work overtime, which can really help lower your energy bills. Think of it as a simple way to keep your money in your pocket and your house at the right temperature.
Common Areas for Weather Stripping
Weather stripping isn't just for windows; you can use it in a bunch of places around your house. Here are some common spots where it can make a big difference:
- Around door frames
- Along window sashes
- At the bottom of doors
- Even attic hatches
Basically, anywhere you feel a draft, that's a good place to consider adding some weather stripping. Sealing these areas helps keep the outside air where it belongs – outside!
Benefits Beyond Energy Savings
Weather stripping does more than just save you money on your energy bill. Here are some other perks:
- It helps keep out dust and pollen, which is great if you have allergies.
- It can reduce outside noise, making your home a bit more peaceful.
- It prevents water from seeping in, which can cause damage to your walls and floors.
Weather stripping is a small investment that can really pay off in terms of comfort and savings. It's one of those simple home improvements that makes a big difference.
Maximizing Energy Efficiency with Weather Stripping
Combining Weather Stripping with Insulation
To really boost your home's energy efficiency, think about pairing weather stripping with good insulation. Sealing those drafts around doors and windows is great, but when you add insulation to your walls and attic, you're creating a super effective barrier against temperature changes. It's like giving your house a cozy blanket! This combo can seriously cut down on your energy bills. I'm talking potentially saving up to 10% each year. That's money back in your pocket!
Seasonal Tips for Energy Efficiency
To get the most out of your weather stripping, here are some seasonal tips I've found helpful:
- In the fall, take a walk around your house and check all your weather stripping. Replace anything that looks worn or damaged. It's like giving your house a little check-up before winter hits.
- During winter, make sure all those gaps are sealed tight. You don't want any cold air sneaking in and making your furnace work overtime.
- When spring rolls around, check for any damage caused by the winter weather. Ice and snow can be tough on weather stripping, so give it a good once-over.
- Summer is a great time to weather seal your windows to keep that cool air inside. Nobody wants to pay to cool the great outdoors!
Weather stripping is a simple yet effective way to improve your home's energy efficiency. Regular inspections and timely replacements will ensure your home remains well-sealed against the elements for years to come.
Monitoring Your Home's Energy Performance
Keep an eye on your home's energy use. It can help you spot areas where you can save even more. I like to check my energy bills each month to see if there are any big changes. If you see a sudden spike, it could mean there's a problem with your window weather stripping or something else. There are also energy monitors you can buy that track your usage in real-time. They can be a great way to see exactly where your energy is going and where you can cut back.
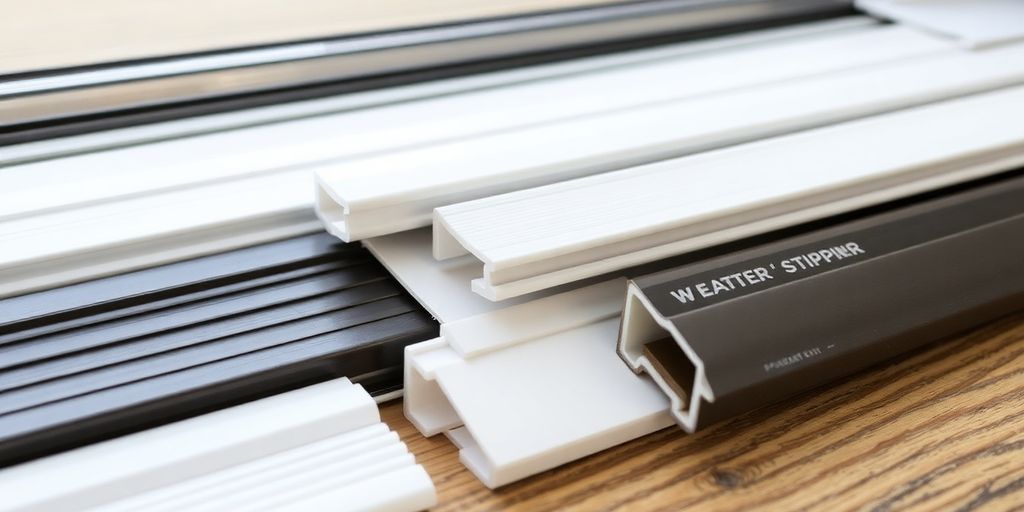
Types of Window Weather Stripping Materials
Okay, so you're ready to get serious about weather stripping. That's great! But before you run to the hardware store, it's important to know what your options are. There are a bunch of different materials out there, and each one has its own strengths and weaknesses. Picking the right one can make a big difference in how well it seals and how long it lasts. Let's explore weatherstripping materials.
Foam Weather Stripping
Foam weather stripping is often the go-to for folks on a budget, and it's super easy to put in. You can find it in all sorts of sizes, which is nice for filling different gaps. The downside is that it's not the most durable option. It can wear out pretty quickly, especially in spots that get a lot of use. Think of it like this: it's good for a quick fix, but you might be replacing it sooner than you'd like. It's great for those odd-shaped window gaps though.
Rubber Weather Stripping
Rubber weather stripping is a step up in terms of durability. It's flexible, creates a good seal, and can handle weather and chemicals without breaking down. This makes it a solid choice for both doors and windows. It's a bit more expensive than foam, but it'll last longer, so you're getting more bang for your buck in the long run. Plus, some rubber weather stripping is made from recycled stuff, which is a nice bonus if you're trying to be eco-friendly. It's a good idea to check out rubber weather stripping options before making a decision.
Metal Weather Stripping
Metal weather stripping is the heavy-duty option. It's tough and can take a beating, making it ideal for high-traffic areas. However, it's not as flexible as foam or rubber, and it can be a pain to install. You might even need to call in a pro to get it right. But if you want something that's going to last for years, metal is the way to go. It's often made of aluminum, bronze, or stainless steel, so you know it's built to last. Here's a quick rundown:
- Pros: Super durable, long-lasting
- Cons: Hard to install, less flexible
- Best for: Areas that get a lot of wear and tear
Choosing the right weather stripping really depends on your specific needs and budget. Think about how much use the window or door gets, how big the gaps are, and how long you want the weather stripping to last. A little research can save you time and money in the long run.
Installation Techniques for Effective Weather Stripping
Preparing Your Windows for Weather Stripping
Before you even think about slapping on some weather stripping, you gotta prep those windows. I mean, seriously, don't skip this step. It's like trying to paint a wall without cleaning it first—the results will be... less than stellar. Here's what I usually do:
- First, give the window frames a good scrub. I use a mix of warm water and mild soap. Get rid of all the dirt, dust, and cobwebs. You want a clean surface so the weather stripping tape can actually stick.
- Next, check for any old, peeling paint or caulk. Scrape that stuff off. A putty knife works wonders here. You want a smooth surface, remember?
- Finally, let everything dry completely. I usually wait a few hours, just to be sure. Damp surfaces and adhesive don't mix.
Prepping your windows is half the battle. A clean, dry surface ensures the weather stripping adheres properly and lasts longer. Trust me, a little elbow grease now saves you headaches later.
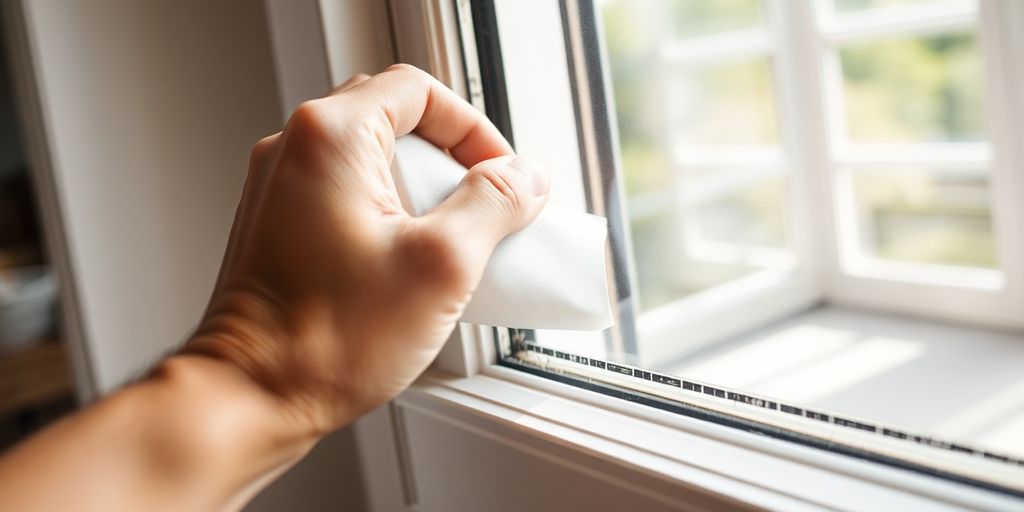
Step-by-Step Installation Guide
Alright, now for the fun part! Actually putting the weather stripping on. Don't worry, it's not rocket science. Just follow these steps, and you'll be golden:
- Measure the window frame. I always measure twice and cut once. It's a saying for a reason. Get the length you need for each side of the window.
- Cut the weather stripping to size. Use a utility knife or scissors. Make sure the cuts are clean and straight.
- Peel off the backing (if it's the adhesive type). Expose the sticky side. Be careful not to get it stuck to itself. That's happened to me more times than I care to admit.
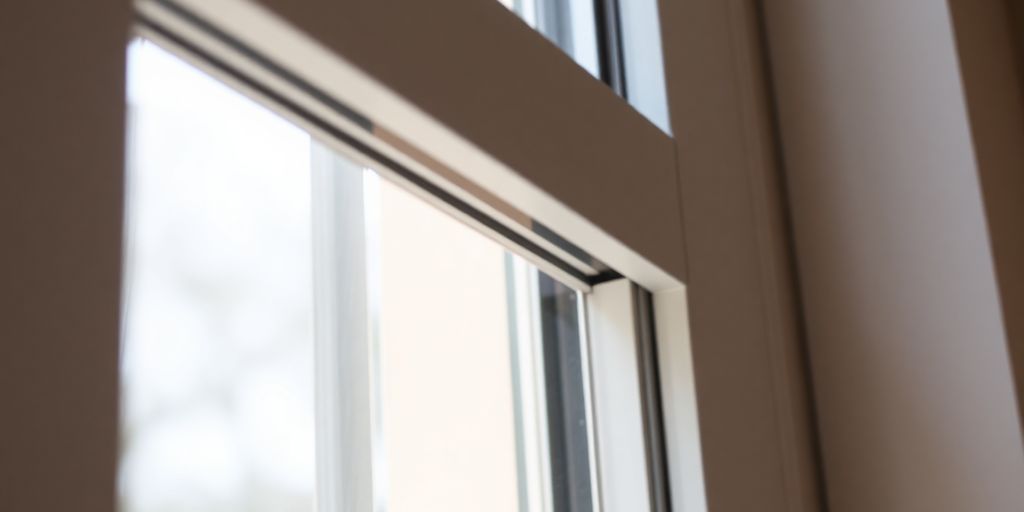
- Apply the weather stripping to the window frame. Press it firmly into place. Start at one corner and work your way around. Make sure it's snug against the frame. You want a tight seal.
- Check for gaps. Run your finger along the weather stripping. If you feel any drafts, add more weather stripping or adjust what you've already installed.
Common Mistakes to Avoid
Okay, so even though it's not rocket science, there are still some common pitfalls to watch out for. Here are a few things I've learned the hard way:
- Not measuring correctly. Seriously, measure twice, cut once. I can't stress this enough. Accurate measurements are key.
- Skipping the cleaning step. I know it's tempting to skip it, but don't. A dirty surface means the weather stripping won't stick properly.
- Using the wrong type of weather stripping. There are different types for different situations. Make sure you're using the right one for your windows. For example, foam weather stripping is good for some things, but not everything.
- Applying the weather stripping too loosely. You want a tight seal. Press it firmly into place. No gaps allowed.
Don't rush the job. Take your time, be careful, and pay attention to detail. A well-installed weather stripping job can make a huge difference in your home's energy efficiency. Plus, you'll feel a sense of accomplishment. And who doesn't love that?
Seasonal Maintenance for Window Weather Stripping
Maintaining your window weather stripping isn't a one-time thing; it's a year-round gig if you want to keep your house comfy and your energy bills down. Each season brings its own set of challenges, so let's break it down.
Spring and Summer Checks
Spring and summer are great times to give your weather stripping a good once-over. Winter can be rough on it, so you're looking for any damage that might have happened.
Here's what I usually do:
- First, I walk around and inspect for any weather stripping damaged by the cold or ice. Cracks, tears, or pieces that have come loose are all bad news.
- Next, I clean the window tracks and door thresholds. Dirt and grime can build up and stop the weather stripping from sealing properly.
- If you're planning on opening certain windows a lot during the warmer months, think about using removable weather stripping on those. It's easier to deal with.
Fall and Winter Preparations
Fall is the time to get ready for the cold. This is when you want to make sure everything is sealed up tight before the temperatures drop.
Here's my checklist:
- I always replace any worn weather stripping before winter hits. It's much easier to do it when it's not freezing outside.
- For doors and windows that don't get used much, I sometimes use temporary weather stripping solutions. They're not as durable, but they're good for sealing up those rarely used spots.
- Adding extra insulation to north-facing doors and windows can really help cut down on drafts.
Keeping an eye on your weather stripping and doing a little maintenance each season can make a big difference in how comfortable your home is and how much you spend on energy. It's a small thing that can have a big impact.
Long-Term Care Tips
To really extend the life of your weather stripping, here are a few things I've learned over the years:
- Regularly check your weather stripping for signs of wear and tear. Catching problems early can save you from bigger issues later.
- Clean the weather stripping a few times a year to keep it working well. Just wipe it down with a damp cloth to remove any dirt or debris.
- Make sure all gaps are sealed to maintain home's energy efficiency. Even small gaps can let in a lot of cold air in the winter or hot air in the summer.
Choosing the Right Weather Stripping for Your Home
Choosing the right weather stripping can feel like a chore, but it's important to get it right. It's not just about slapping any old material around your windows; it's about finding the best fit for your specific needs and situation. Let's break down the key things to consider.
Factors to Consider
When you're trying to pick out weather stripping, think about a few things. First, where are you planning to use it? Different materials work better in different spots. For example, you might want to use foam tape for small gaps, but something sturdier like metal for high-traffic doors. Also, consider the weather in your area. If you live somewhere with harsh winters, you'll need something that can handle the cold and moisture. Think about how much wear and tear the area gets, too. A window that's rarely opened doesn't need the same level of protection as a frequently used door.
Cost vs. Durability
Okay, let's talk money. Weather stripping comes in all price ranges, and it's tempting to go for the cheapest option. But remember, you often get what you pay for. Cheaper materials might not last as long, meaning you'll have to replace them more often. Durability is key here. While a pricier option might seem like a bigger investment upfront, it could save you money in the long run if it lasts for years. It's a balancing act. You need to find something that fits your budget but also offers good value for its lifespan.
Environmental Impact of Materials
Have you ever thought about how your weather stripping affects the environment? Some materials are more eco-friendly than others. For example, rubber weather stripping is often made from recycled stuff, which is a plus. And when you're done with it, can it be recycled? These are good questions to ask. Choosing sustainable materials is a small way to make a difference. Plus, a well-sealed home uses less energy, which is good for the planet and your wallet. It's a win-win!
Professional vs. DIY Weather Stripping Solutions
When to Hire a Professional
Okay, so you're thinking about weather stripping your windows. Maybe you've even tried a little bit already. But when does it make sense to call in the pros? Well, if you've tried a few DIY attempts and still feel drafts, that's a big sign. Also, if you're dealing with complex window designs or live in a historic home, it's often best to let someone with experience handle it. They'll know how to get a good seal without damaging anything. And if you're looking for a really durable, long-term solution, professionals usually have access to better materials and techniques.
Benefits of DIY Installation
Going the DIY route with weather stripping can be pretty rewarding. The biggest advantage is definitely the cost savings. You're only paying for the materials, not labor. Plus, you get to learn a new skill and customize the job exactly how you want it. It can be a good option if you have standard windows, a bit of free time, and enjoy tackling home improvement projects. Just make sure you measure carefully and choose the right type of weather stripping for your windows. You'll need cleaning supplies to prepare surfaces and a utility knife or scissors.
Cost Comparisons
Let's talk numbers. DIY weather stripping is cheaper upfront, but professional installation might save you money in the long run through better energy efficiency. Here's a rough idea:
| Aspect | DIY | Professional |
|---|---|---|
| Initial Cost | Low | High |
| Time Spent | High | Low |
| Energy Savings | Moderate | High |
| Warranty | No | Yes |
Ultimately, the best choice depends on your budget, skills, and how much you value your time. If you're comfortable with basic home repairs and want to save money, DIY might be the way to go. But if you want a guaranteed, long-lasting solution and don't mind spending a bit more, hiring a professional is often worth it. You can ask friends or family for recommendations to find a good service provider. If you are looking for a Cloudflare error, you might need to contact your service provider.
Wrapping It Up
In the end, weather stripping is a straightforward way to boost your home's energy efficiency and comfort. By sealing up those pesky gaps around your windows and doors, you can keep your home cozy in the winter and cool in the summer. This not only makes your living space more pleasant but also helps you save on energy costs. Just remember to pick the right type of weather stripping and install it correctly. Regular maintenance and timely replacements will keep your home sealed tight for years. So, take a little time to weather strip your home and enjoy the perks of a more comfortable and budget-friendly environment.
Frequently Asked Questions
What is window weather stripping?
Window weather stripping is a material used to seal gaps around windows and doors. It helps keep warm or cool air inside your home, making it more comfortable and energy-efficient.
How does weather stripping help save energy?
Weather stripping blocks drafts and air leaks, which means your heating and cooling systems don’t have to work as hard. This can lower your energy bills.
What are the common materials used for weather stripping?
Common materials include foam, rubber, and metal. Each type has its own benefits and can be used in different situations depending on your needs.
How do I install weather stripping?
To install weather stripping, first clean the area where it will go. Then, cut the weather stripping to the right length and press it into place. Make sure it fits snugly to block any drafts.
How often should I check my weather stripping?
It's a good idea to check your weather stripping at least once a year, especially before winter. Look for any signs of wear or damage and replace it if needed.
Can I do weather stripping myself or should I hire a professional?
You can definitely do weather stripping yourself if you feel comfortable with basic DIY tasks. However, if you have complex windows or want a more permanent solution, hiring a professional might be best.