Essential Guide to Bottom Window Sash Replacement: Step-by-Step Instructions for Homeowners
Replacing the bottom window sash can seem like a daunting task, but with the right guidance, homeowners can tackle this project with confidence. This guide will walk you through the essentials of bottom window sash replacement, from understanding what a sash is to the tools you'll need and the steps involved in the process. Whether you're dealing with drafts or simply want to improve your home's energy efficiency, this guide will help you achieve a successful replacement.
Key Takeaways
- A bottom window sash holds the glass and allows the window to open and close.
- Common problems include drafts and difficulty in opening or closing the window.
- Replacing the sash can improve energy efficiency and enhance the appearance of your home.
- Having the right tools and materials is essential for a smooth replacement process.
- Regular maintenance can extend the life of your new window sash.
Understanding Bottom Window Sash Replacement
What Is a Bottom Window Sash?
A bottom window sash is the part of the window that holds the glass and allows it to open and close. It plays a crucial role in the window's operation and energy efficiency. Different types of windows have different sash designs:
- Double-hung windows: Sashes slide vertically.
- Casement windows: Sashes crank outward.
- Sliding windows: Sashes slide horizontally.
- Awning windows: Sashes hinge outward from the bottom.
Common Issues with Bottom Window Sashes
Over time, bottom window sashes can face several problems, including:
- Difficulty opening or closing: This may indicate wear or damage.
- Drafts: Poor insulation can lead to energy loss.
- Visible damage: Cracks or rot can compromise the sash's integrity.
Benefits of Replacing Your Bottom Window Sash
Replacing a worn-out bottom window sash can provide several advantages:
- Improved energy efficiency: New sashes can help reduce heating and cooling costs.
- Enhanced security: A new sash can better secure your home.
- Better aesthetics: Fresh sashes can improve your window's appearance.
Replacing your bottom window sash can significantly enhance your home's comfort and efficiency.
For those looking to replace their bottom window sash, consider using the wrs kinco 1-1/2" sash cam - white for a reliable fit and function. This product is designed to ensure smooth operation and durability, making it a great choice for your project.
Tools and Materials Needed for Bottom Window Sash Replacement
When replacing a bottom window sash, having the right tools and materials is crucial for a smooth process. Here’s what you’ll need:
Essential Tools for the Job
- Measuring tape: To get accurate dimensions of your window.
- Utility knife: For cutting through any caulk or paint.
- Putty knife: Useful for prying off old sashes and stops.
- Screwdriver: To remove screws from the window frame.
- Hammer: For securing new components.
- Safety gear: Always wear gloves and goggles to protect yourself.
Choosing the Right Replacement Kit
When selecting a replacement kit, consider:
- The material of your current sash (wood, vinyl, etc.).
- The size of your window opening.
- Compatibility with existing hardware.
Safety Gear and Precautions
Before starting, ensure you have:
- Gloves: To protect your hands from sharp edges.
- Safety goggles: To shield your eyes from debris.
- Dust mask: If you’re working with older windows that may contain lead paint.
Remember: Proper preparation and the right tools can make your sash replacement project much easier and safer!
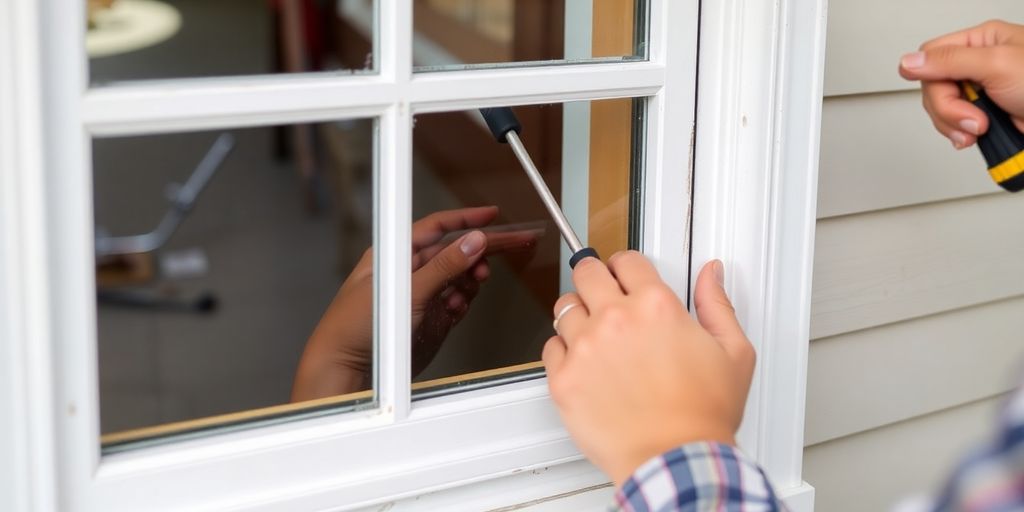
Step-by-Step Guide to Removing the Old Bottom Sash

Preparing Your Workspace
Before you start, make sure your workspace is clean and organized. A tidy area helps prevent accidents. Gather all your tools and materials so you can work efficiently.
Removing the Window Stops
- Score the paint between the sash stop and the window frame using a utility knife. This helps to avoid breaking the stops.
- Use a putty knife to gently pry up the sash stops. Be careful to apply even pressure.
- Once removed, place the sash stops aside safely to reuse later.
Detaching the Old Sash
- If your window has balancing weights, cut the rope that connects the bottom sash to its weights. This will allow the sash to come out easily.
- Grip the top of the bottom sash and tilt it downwards. Once it’s flat, lift the bottom pins out of the window frame to remove the sash completely.
- Inspect the frame for any damage or rot before proceeding with the installation of the new sash. Address any issues to ensure a smooth replacement.
Remember, taking your time during this process will lead to a better outcome. Rushing can cause mistakes that may require extra work later.
Important Note
If you’re using a replacement kit, like the wrs 1-7/16" sash cam - black, ensure you have all the necessary components ready for a smooth installation.
Installing the New Bottom Window Sash
Fitting the New Sash into Place
To start, engage both sides of the sash into their tracks. Carefully insert the sash into the lower opening, ensuring it remains level. Apply slight pressure to make sure it’s seated properly. Once in place, gently push the sash up to allow it to catch in the balancing system. Finally, test the sash by moving it up and down to confirm smooth operation.
Securing the Sash
After fitting the sash, it’s time to secure it. Follow these steps:
- Replace the window stops by measuring and cutting them to fit if necessary.
- Nail the side and head stops back into place, ensuring they are snug against the jamb liners.
- If needed, apply a small bead of caulk along the edges for a weather-tight seal.
Testing for Proper Operation
Before finishing up, run these tests to ensure everything is working correctly:
- Open and close the sash several times to check for smooth operation.
- Verify that the sash locks properly when closed.
- Ensure the weatherstripping makes good contact all around, which is crucial for energy efficiency.
- Make any necessary adjustments to the jamb liners or stops to improve performance.
Remember, taking your time during installation can prevent future issues and ensure your windows function well for years to come!
Tips for a Successful Bottom Window Sash Replacement

Double-Check Your Measurements
Before you start, always double-check your measurements. Inaccurate measurements can lead to a poor fit, which can cause problems later on. Measure at the top, middle, and bottom of the window frame to ensure accuracy.
Use High-Quality Materials
Investing in high-quality materials is essential. A good sash replacement kit will not only perform better but also last longer. Look for reputable brands and consider options like the truth white sash cam for reliable performance.
Seek Expert Advice When Needed
If you’re unsure about any steps, don’t hesitate to ask for help. Consulting with experts or watching instructional videos can make the process smoother. Remember, it’s okay to seek assistance if you feel overwhelmed.
Taking your time and working carefully will lead to a more professional-looking installation. Rushing can result in mistakes that may be costly to fix.
Additional Tips
- Work methodically: Take your time during each phase of the project.
- Perform regular maintenance: Keep your windows clean and check the weatherstripping periodically.
- Test the operation: After installation, open and close the sashes several times to ensure they work smoothly.
By following these tips, you can ensure a successful bottom window sash replacement that enhances your home’s comfort and efficiency.
Maintaining Your New Bottom Window Sash
Regular Cleaning and Inspection
To keep your new bottom window sash in great shape, make sure to clean it regularly. Here are some simple steps:
- Wipe down the sash with a damp cloth to remove dust and dirt.
- Check for any signs of wear or damage, especially around the edges.
- Inspect the weatherstripping to ensure it’s intact and effective.
Addressing Minor Issues Early
If you notice any small problems, it’s best to fix them right away. This can prevent bigger issues later. Here are some common minor issues:
- Sticking Sash: If the sash doesn’t move smoothly, check for debris in the tracks.
- Drafts: If you feel a draft, inspect the weatherstripping and replace it if necessary.
- Visible Damage: Look for chips or cracks and repair them promptly.
Ensuring Proper Weatherstripping
Good weatherstripping is key to energy efficiency. Here’s how to maintain it:
- Regularly check the condition of the weatherstripping.
- Replace any worn or damaged strips to keep drafts out.
- Consider using a high-quality weatherstripping material for better insulation.
Remember, regular maintenance can extend the life of your window sash and improve your home’s energy efficiency.
By following these simple tips, you can ensure that your new bottom window sash remains functional and attractive for years to come. Don’t forget to check the wrs truth left hand entrygard casement sash lock - bronze for added security and efficiency!
Wrapping Up Your Window Sash Replacement
Replacing the bottom window sash can seem tough, but with the right steps, it’s totally doable! By measuring carefully, using good materials, and taking your time, you can make your windows look great and work better. Remember to check your work and keep everything clean to avoid future problems. If you ever feel stuck, don’t hesitate to ask for help or watch some videos for guidance. With a little patience and effort, you’ll enjoy the benefits of your new sash for years to come!
Frequently Asked Questions
Can I just replace the bottom window sash?
Yes, you can replace just the bottom sash. Many replacement kits are designed for this, making it easier for homeowners to do it themselves.
What’s the difference between a window sash and a window frame?
The window frame is the outer structure that holds everything in place, while the sash is the part that holds the glass and moves up and down.
Does a window sash come with glass included?
Yes, most modern sash replacement kits include the glass along with the necessary hardware.
What does a window sash do?
A window sash holds the glass and allows the window to open and close, helping to keep your home insulated.
Why won’t my window sash open smoothly?
If your window sash is sticking, it might be due to dirt or damage. Regular maintenance can help avoid this issue.
Where can I buy a replacement window sash kit?
You can find replacement sash kits at hardware stores or online. Make sure to check the measurements to get the right fit.