The Ultimate Guide to Kerf Weatherstripping Replacement: Enhance Your Door's Efficiency
If you're looking to improve your home's comfort and save on energy bills, replacing your kerf weatherstripping is a great solution. This guide will walk you through everything you need to know about kerf weatherstripping, including its benefits, installation tips, and maintenance advice. Whether you're a seasoned DIYer or a beginner, this guide will help you enhance your door's efficiency and keep your home cozy all year round.
Key Takeaways
- Good weatherstripping can lower energy costs and make your home more comfortable.
- Different weatherstripping types work better for various doors and climates.
- When picking weatherstripping, consider its look, price, and how long it lasts.
- Accurate measurements are key for a successful weatherstripping installation.
- Routine checks and maintenance can help your weatherstripping last longer.
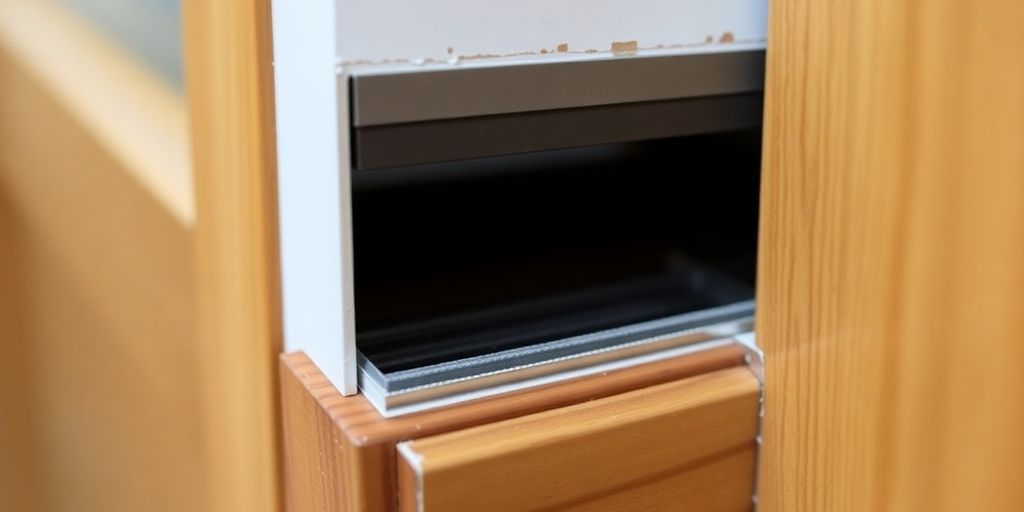
Understanding Kerf Weatherstripping Replacement

What is Kerf Weatherstripping?
Kerf weatherstripping is a type of seal that fits into a groove (or kerf) in the door frame. This helps to block drafts and keep your home comfortable. It is designed to create a tight seal when the door is closed, preventing air leaks that can lead to higher energy bills.
Benefits of Kerf Weatherstripping
Using kerf weatherstripping has several advantages:
- Energy Efficiency: It helps maintain your home’s temperature, reducing heating and cooling costs.
- Easy Installation: Most kerf weatherstripping can be installed without professional help.
- Durability: It is made from materials that can withstand wear and tear over time.
Common Types of Kerf Weatherstripping
There are various types of kerf weatherstripping available:
| Type | Material | Best For |
|---|---|---|
| Foam | Foam | Interior doors |
| Vinyl | Vinyl | Exterior doors |
| Metal | Aluminum or Steel | High-traffic areas |
Choosing the right type is essential for optimal performance.
Proper installation of kerf weatherstripping can significantly enhance your door's efficiency and comfort in your home.
Highlight
For example, the wrs 3/8" clear shower door seal is a great option for those looking to improve their door's sealing capabilities. It is available for $11.99 and is part of a broader selection of window and door hardware, including weatherstripping and various tools.
Tools and Materials Needed for Kerf Weatherstripping Replacement
Essential Tools for the Job
To successfully replace kerf weatherstripping, you will need a few essential tools:
- Utility Knife: For cutting the weatherstripping to size.
- Tape Measure: To measure the door frame accurately.
- Pencil: For marking measurements on the weatherstripping.
- Putty Knife: Useful for removing old weatherstripping.
- Hammer: If you are using nail-on weatherstripping.
Choosing the Right Materials
When selecting materials, consider the following:
- Weatherstripping Type: Choose between adhesive, nail-on, or other types based on your door's needs.
- Durability: Look for materials that can withstand your local climate.
- Cost: Balance your budget with the quality of the materials.
| Material Type | Description | Cost Range |
|---|---|---|
| Adhesive Strips | Easy to install, good for DIY projects | $10 - $30 |
| Nail-on Strips | More durable, requires tools | $15 - $40 |
| Foam Tape | Flexible and easy to cut | $5 - $20 |
Safety Precautions
Always prioritize safety when working on home projects:
- Wear gloves to protect your hands from sharp tools.
- Use safety glasses to shield your eyes from debris.
- Ensure your workspace is clean to avoid accidents.
Remember, proper tools and materials are key to a successful weatherstripping replacement. Taking the time to gather everything you need will make the process smoother and more efficient.
Summary
In summary, having the right tools and materials is crucial for replacing kerf weatherstripping effectively. Make sure to choose durable options that fit your door's requirements, and always follow safety guidelines while working.
Step-by-Step Guide to Measuring Your Door for Kerf Weatherstripping

Preparing Your Door for Measurement
Before you start measuring, make sure your door is clean and free of any obstructions. A clear area helps ensure accurate measurements. Gather your tools: a tape measure, a pencil, and a notepad to jot down your measurements.
How to Measure the Door Frame
- Measure the width: Open the door and measure the width of the door frame from one side to the other. Write down this measurement.
- Measure the height: Measure from the top of the door frame to the bottom. Note this measurement as well.
- Check the kerf: If your door has a kerf (a slot in the jamb), measure its width. Most residential doors have a kerf of about 1/8 inch, but some may be wider, like 1/4 inch.
- Measure the gap: Don’t forget to measure the gap between the bottom of the door and the floor. This is where a door sweep will be installed.
Common Measuring Mistakes to Avoid
- Not measuring twice: Always double-check your measurements to avoid errors.
- Ignoring the kerf: If your door has a kerf, make sure to measure it. This is crucial for a proper fit.
- Forgetting the bottom gap: The gap at the bottom of the door is often overlooked but is essential for a complete seal.
Accurate measurements are key to effective weatherstripping. Take your time and ensure each measurement is precise.
Installing Kerf Weatherstripping: A Detailed Process
Preparing the Door Surface
Before you start, make sure the door surface is clean and dry. Remove any old weatherstripping or debris. This ensures a good bond for the new weatherstripping. A clean surface is essential for effective sealing.
Cutting and Fitting the Weatherstripping
- Measure the Door Frame: Use a tape measure to find the length of the gaps you need to seal.
- Cut the Weatherstripping: Cut the weatherstripping to the measured lengths, leaving a little extra for a snug fit.
- Test Fit: Place the weatherstripping in the frame without removing the adhesive backing to check the fit.
Securing the Weatherstripping in Place
- For adhesive-backed weatherstripping, peel off the backing and press it firmly into place.
- If using nail-in types, secure it with finishing nails every few inches.
- After installation, open and close the door to ensure it operates smoothly and seals properly.
Remember, regular checks on your weatherstripping can help maintain your home's energy efficiency.
By following these steps, you can effectively install kerf weatherstripping and enhance your door's efficiency. This simple process can significantly reduce drafts and improve comfort in your home. For example, the WRS Marvin beige top jamb weatherstripping is designed for durability and easy installation, making it a great choice for your projects.
Maintaining and Troubleshooting Your Kerf Weatherstripping
Regular Maintenance Tips
To keep your kerf weatherstripping in top shape, follow these simple tips:
- Inspect your weatherstripping at least once a year.
- Clean it with mild soap and water to remove dirt.
- Lubricate moving parts to reduce wear and tear.
Common Issues and Solutions
If you notice problems, here are some common issues and how to fix them:
- Gaps and Drafts: Check if the weatherstripping is compressed properly.
- Sticking Doors: Ensure the weatherstripping isn’t too thick. Adjust if necessary.
- Worn Out Material: Replace any damaged sections promptly to maintain efficiency.
When to Replace Your Weatherstripping
It's important to know when to replace your weatherstripping. Look for these signs:
- Cracks or tears in the material.
- Difficulty in opening or closing doors.
- Noticeable drafts even when the door is closed.
Proper maintenance can extend the life of your weatherstripping and keep your home energy-efficient.
Enhancing Door Efficiency with Additional Weatherproofing Techniques
Installing Door Sweeps
Door sweeps are a great way to block drafts at the bottom of your door. They can help keep your home warm in winter and cool in summer. Here are some tips for installing them:
- Choose the right size for your door.
- Attach it securely to prevent gaps.
- Check regularly for wear and tear.
Sealing Door Sides and Top
Sealing the sides and top of your door can further improve energy efficiency. Here’s how:
- Inspect for gaps around the door frame.
- Apply weatherstripping to fill any spaces.
- Ensure a tight fit when the door is closed.
Using Draft Stoppers
Draft stoppers are simple yet effective tools to block cold air. They can be placed at the bottom of the door. Here are some benefits:
- Easy to install and remove.
- Cost-effective solution for drafts.
- Available in various styles to match your decor.
Proper installation of these techniques can significantly enhance your door's efficiency.
By combining these methods, you can create a more comfortable living space and save on energy costs. Regular checks and maintenance will ensure your weatherproofing remains effective for years to come.
Additionally, consider using the wrs storm door protector chain & spring - zinc-plated for added security and protection against wind damage. This durable accessory is designed to enhance the efficiency of your storm doors while ensuring they remain secure against the elements.
Choosing the Best Kerf Weatherstripping for Your Needs
When it comes to selecting the right kerf weatherstripping, there are several important factors to keep in mind. Choosing the right material can significantly impact your door's efficiency. Here are some key points to consider:
Factors to Consider
- Location: Think about where you live and the typical weather conditions.
- Frequency of Use: If your door is used often, opt for more durable materials.
- Cost: Balance your budget with the quality and longevity of the weatherstripping.
Common Types of Kerf Weatherstripping
| Type | Material | Durability | Best For |
|---|---|---|---|
| V Strip | Plastic/Metal | High | Sides of doors/windows |
| Felt | Fabric | Low | Infrequent use |
| Foam Tape | Foam/Rubber | Medium | Irregular gaps |
| Tubular | Rubber/Vinyl | High | High-traffic areas |
Selecting the right kerf weatherstripping not only enhances your door's efficiency but also contributes to energy savings.
Customer Reviews and Recommendations
- Look for products with positive feedback on durability and ease of installation.
- Check for recommendations from friends or family who have done similar projects.
- Consider brands known for quality, such as the WRS Storm Door Protector Chain & Spring, which is designed for both residential and commercial use, featuring a zinc-plated finish for corrosion resistance.
By taking these factors into account, you can make an informed decision that will keep your home comfortable and energy-efficient.
Final Thoughts on Kerf Weatherstripping Replacement
In conclusion, replacing kerf weatherstripping is a smart way to boost your home's energy efficiency and comfort. By sealing gaps around your doors, you can keep the cold air out during winter and the heat out in summer. Remember to choose the right type of weatherstripping for your specific door and climate. Regular checks and maintenance will help ensure that your weatherstripping lasts longer and works effectively. With the right tools and a little effort, you can make your home more comfortable and save money on energy bills.
Frequently Asked Questions
What is kerf weatherstripping?
Kerf weatherstripping is a type of seal that fits into a groove, or kerf, in the door frame. It helps block drafts and keeps your home comfortable.
Why should I replace my weatherstripping?
Replacing weatherstripping can make your home more energy-efficient by preventing air leaks, which can save you money on heating and cooling bills.
How do I measure my door for weatherstripping?
To measure your door, check the width and height of the door frame, and also measure any gaps at the bottom to ensure a proper fit.
What tools do I need to install kerf weatherstripping?
You will need a tape measure, a utility knife, and possibly a pencil to mark your measurements.
How often should I check my weatherstripping?
It's a good idea to check your weatherstripping at least once a year for wear and tear, especially before winter.
Can I install weatherstripping myself?
Yes! Installing weatherstripping is a simple DIY task that most homeowners can do with just a few tools.