A Complete Guide on How to Install 3/8 Self Closing Inset Hinges for Your Cabinets
If you're looking to upgrade your kitchen or bathroom cabinets, installing 3/8 self-closing inset hinges is a great project to consider. These hinges not only enhance the aesthetic appeal of your cabinets but also provide convenience by ensuring that doors close automatically. This guide will walk you through the entire process, from understanding the hinges to the final adjustments, making it easy for anyone to follow along and achieve professional results.
Key Takeaways
- 3/8 self-closing inset hinges are designed for a seamless look in cabinetry.
- Proper measurement and alignment are crucial for a successful installation.
- Using the right tools can make the installation process smoother and faster.
- Regular maintenance, such as cleaning and lubrication, extends the life of your hinges.
- Adjustments may be needed after installation to ensure doors close properly.
Understanding 3/8 Self Closing Inset Hinges
Features of Self Closing Inset Hinges
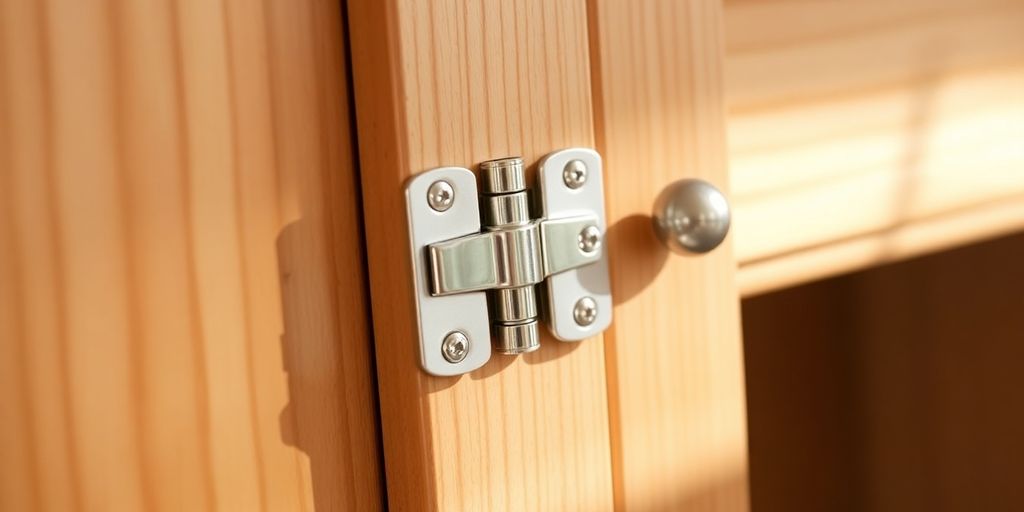
So, let's talk about these self-closing inset hinges. They're kinda cool because they do the closing for you. No more slamming cabinet doors. They pull the door shut gently, which is neat, right? They fit inside the cabinet frame, so you don't see much of them when the door's closed. And they're pretty sturdy, so they last a good while.
Benefits of Using 3/8 Inset Hinges
Why go for 3/8 inset hinges? Well, they're perfect for those who want a clean look. With these hinges, the door sits flush with the cabinet, giving it a smooth finish. Plus, they help in keeping the door aligned. No more wonky doors that don't sit right. They also make sure the doors close properly every time.
Common Applications for Cabinetry
These hinges are a go-to for many types of cabinets. You see them a lot in kitchens, bathrooms, and even in some furniture pieces. They're versatile and work well in places where you want a neat appearance and reliable function. Basically, if you want your cabinets to look good and work well, these hinges are a solid pick.
When you’re thinking about updating your cabinets, consider these hinges for a blend of style and function. They might just be the upgrade you didn’t know you needed.
Gathering Necessary Tools and Materials
Essential Tools for Installation
Alright, before you dive into installing those 3/8 self-closing inset hinges, you gotta make sure you've got the right tools. Here's the deal: having the right stuff makes this job way easier. So, here's what you'll need:
- Screwdriver (a Phillips head usually does the trick)
- Drill with a set of bits
- Tape measure
- Pencil for marking
- Level
These are the basics, but depending on your cabinet setup, you might need a few extras. Don't forget the drill bits that match your hinge screws!
Choosing the Right Hinges for Your Cabinets
Now, picking the right hinges isn't just about grabbing the first ones you see. You gotta think about the style and weight of your cabinet doors. Are they heavy? Light? Also, make sure the hinges match the look you're going for. Some folks like the shiny ones, others go for a matte finish. Just make sure they're compatible with your cabinet type.
Safety Equipment and Precautions
Safety first, folks! When you're working with power tools, it's smart to wear some protective gear. Here's a quick list:
- Safety goggles to protect your eyes
- Gloves to keep your hands safe
- Ear protection if you're using loud tools
And remember, take your time. Rushing leads to mistakes, and nobody wants to redo this job. Stay safe and take it slow.
Preparing Your Cabinets for Installation
Removing Old Hinges and Hardware
First up, get those old hinges and any other hardware off your cabinets. Grab a screwdriver and unscrew them. Keep those screws somewhere safe in case you need them later. If the hardware is stubborn, maybe use a little elbow grease or a flathead to pry them off.
Measuring and Marking Drill Points
Now, you gotta measure where your new hinges will go. Use a tape measure and mark the spots with a pencil. Make sure these marks are even on both the cabinet and the door, or you'll end up with a wonky door. You don’t want that.
Ensuring Cabinet Door Alignment
Before you drill, double-check that your cabinet doors are lined up right. Hold them in place and see if they look straight. If they’re off, adjust your marks. This step saves you from redoing your work later.
Remember, prepping your cabinets right makes the rest of the job smoother. Take your time with these steps and you’ll thank yourself later.
Step-by-Step Guide to Installing Hinges
Drilling Holes for Hinge Cups
Okay, let's get started with the drilling part. First up, grab your drill and a 35mm bit. You're gonna want to mark where the hinge cups go. Usually, it's about 3.5 inches from the top and bottom of the cabinet door. Once you've got your spots marked, drill those holes. Be sure to clear out any wood shavings so the cups fit snugly.
Attaching the Hinge to the Cabinet Door
Now, take those hinge cups and fit them into the holes you just drilled. Make sure they’re aligned properly. Use a couple of screws to secure them. You don't want them wobbling around. A steady hand here makes all the difference.
Securing the Mounting Plate
Next up, it's time to deal with the mounting plate. This is the part that goes inside the cabinet. Line it up with the marks you made earlier. Drill some pilot holes first so you don't split the wood. Then, screw the plate into place. Once that's done, you can clip the door onto the mounting plate. If it's not lining up perfectly, just loosen the screws a bit and adjust.
Remember, patience is key. Take your time with each step and double-check your work. You'll thank yourself later when everything fits just right.
Adjusting and Testing Your Cabinet Doors

Fine-Tuning Hinge Alignment
Alright, you've got the hinges on, but maybe things aren't lining up just right. No stress, it happens. Grab your screwdriver and make small tweaks. You might need to loosen one screw, adjust the door, and then tighten it back up. Keep doing this until the door sits just how you want it. Remember, patience is key here.
Testing the Self-Closing Mechanism
Now, the fun part: seeing if these doors close on their own. Gently push the door and let it go. If it swings shut smoothly, you're golden. If not, you might need to adjust the tension on the hinge. Some hinges have a tension screw you can fiddle with.
Troubleshooting Common Issues
Sometimes things don't go as planned. If the door is crooked, check the alignment again. If it's not closing all the way, make sure nothing's blocking it. Here's a quick checklist:
- Door alignment: Make sure it's straight.
- Obstructions: Check for any items or debris.
- Tension: Adjust the tension screw if needed.
Getting the doors just right can take a bit of trial and error. But once they're working like a charm, it's totally worth it. You'll love how smoothly they close every time.
And there you have it! Your cabinets should be looking and working great now.
Maintenance Tips for Long-Lasting Hinges

Regular Cleaning and Lubrication
Keeping your hinges clean and well-lubricated is key to making them last. Dust and grime can build up over time, causing the hinges to stick or squeak. Just wipe them down with a damp cloth every now and then. For lubrication, a bit of oil or grease does wonders. Apply it to the moving parts and wipe away any excess.
Inspecting for Wear and Tear
Check your hinges regularly for any signs of wear and tear. Look for loose screws, rust, or any damage. If the hinges are looking a bit worn, it might be time to tighten things up or consider replacements. Don't wait until a hinge is completely busted to address the issue.
Replacing Damaged Hinges
When a hinge is beyond repair, it's best to replace it. Make sure to choose the right size and type for your cabinet. Installing new hinges might seem like a hassle, but it's worth it for the smooth operation of your cabinet doors. Plus, new hinges can really boost the look of your cabinets.
Final Thoughts on Installing 3/8 Self Closing Inset Hinges
Installing 3/8 self-closing inset hinges can seem tricky at first, but with the right steps, it becomes manageable. By following the instructions carefully, you can ensure your cabinet doors close smoothly and securely. Remember to take your time, measure accurately, and double-check your work. With a little patience, you’ll have beautifully functioning cabinets that enhance your space. Enjoy your newly installed hinges and the convenience they bring to your daily routine!
Frequently Asked Questions
What are 3/8 self-closing inset hinges?
3/8 self-closing inset hinges are special hinges that allow cabinet doors to close automatically. They are designed to fit inside the cabinet frame, giving a clean look.
How do I install 3/8 self-closing inset hinges?
To install these hinges, first remove the old hinges, then drill holes for the new hinges, and finally attach them to both the cabinet door and the frame.
What tools do I need for the installation?
You will need a drill, a drill bit, screws, a screwdriver, and a measuring tape to install the hinges properly.
Can I adjust the hinges after installation?
Yes, many self-closing hinges allow for adjustments even after they are installed. You can fine-tune their position for better alignment.
What should I do if the cabinet door doesn’t close properly?
If the door doesn’t close right, check the hinge alignment and make sure the screws are tight. You may need to adjust the hinges.
How often should I maintain my cabinet hinges?
It's a good idea to check your hinges every few months. Clean them and apply lubricant if needed to keep them working smoothly.