A Step-by-Step Guide on How to Remove Old Double Hung Windows Safely and Efficiently
Taking out old double-hung windows might look like a big task, but it's actually pretty doable if you break it down into steps. This guide will help you through it, from getting your tools ready to dealing with the leftover materials. You'll find out how to remove window sashes, handle the frames, and safely dispose of everything when you're done. It's all about being patient and careful, and soon enough, you'll have those old windows out without a hitch.
Key Takeaways
- Always wear gloves and goggles to protect yourself.
- Clear the area around the windows to avoid accidents.
- Take your time when detaching window frames to avoid damage.
- Use a pry bar gently to separate the frame from the wall.
- Consider recycling old materials instead of just throwing them away.
Preparing for Window Removal

Gathering Necessary Tools and Materials
Before you dive into removing those old double-hung windows, make sure you've got all the right tools and materials ready. This isn't just about having a hammer and some nails. Nope, you'll need a whole list of stuff. Here's what you'll want to gather:
- Utility Knife: For slicing through that stubborn caulking.
- Pry Bar: This will be your best friend when it comes to prying out the window frame.
- Screwdriver: Handy for removing any screws or fasteners.
- Drop Cloths: To keep your floors and furniture safe from dust and debris.
- Safety Gear: Gloves and goggles, because safety should always come first.
Having these tools at your fingertips will make the entire process a whole lot smoother.
Clearing the Work Area
Next up, you'll want to clear out your workspace. Trust me, the last thing you want is to trip over a chair or knock over a plant while you're holding a window frame. Here's how you can prep the area:
- Move any furniture or items that are near the window.
- Take down curtains, blinds, or any window treatments.
- Lay down those drop cloths to catch any falling debris.
A tidy workspace means fewer accidents and a quicker job.
Wearing Protective Gear
Now, let's talk about keeping yourself safe. Window removal isn't just about muscle and tools; it's about making sure you don't end up with a nasty cut or worse. Always wear protective gear when working on windows.
- Gloves: Protect your hands from sharp edges and broken glass.
- Safety Glasses: Keep dust and debris out of your eyes.
- Dust Mask: Avoid breathing in any harmful particles.
Taking the time to gear up properly can save you from a trip to the ER. It's a small step that makes a big difference.
Understanding the Structure of Double Hung Windows

Identifying Window Sashes and Frames
When you're about to tackle the task of removing old double-hung windows, it's crucial to get familiar with the parts of the window. Double-hung windows typically consist of two sashes, both of which can move up and down. The sashes are the parts that hold the glass in place. The frame surrounds these sashes and fits into the wall, holding everything together. Knowing how these parts work together makes the removal process much easier.
Recognizing Fasteners and Seals
Before you start, take a moment to look at the fasteners and seals. These are the small but important components that keep your windows secure and insulated. You'll find screws, latches, and sometimes clips that hold the sashes in place. The seals, often made of weatherstripping, prevent drafts and moisture from getting inside. Understanding the location and purpose of these elements is key to a smooth removal.
Inspecting for Damage or Rot
It's a good idea to inspect the window for any signs of damage or rot before you begin. Look for cracks in the glass or any warping in the wood. If the frame is rotting or the seals are damaged, it might complicate the removal process. Addressing these issues beforehand will save you time and hassle later on. Remember, a careful inspection can reveal underlying problems that might need fixing before installing a new window.
Step-by-Step Process to Remove Old Double Hung Windows
Removing Window Treatments and Sashes
Start by taking down any curtains, blinds, or other window treatments. This will give you clear access to the window frame. Don't rush this step, as tangled blinds or drapes can make the job harder.
Next, focus on the window sashes. For double-hung windows, you'll need to slide the sash up or down to access the screws or pins holding it in place. Unscrew these carefully with a screwdriver, and gently lift the sash out of the frame. Be cautious, as the sash can be heavier than it looks.
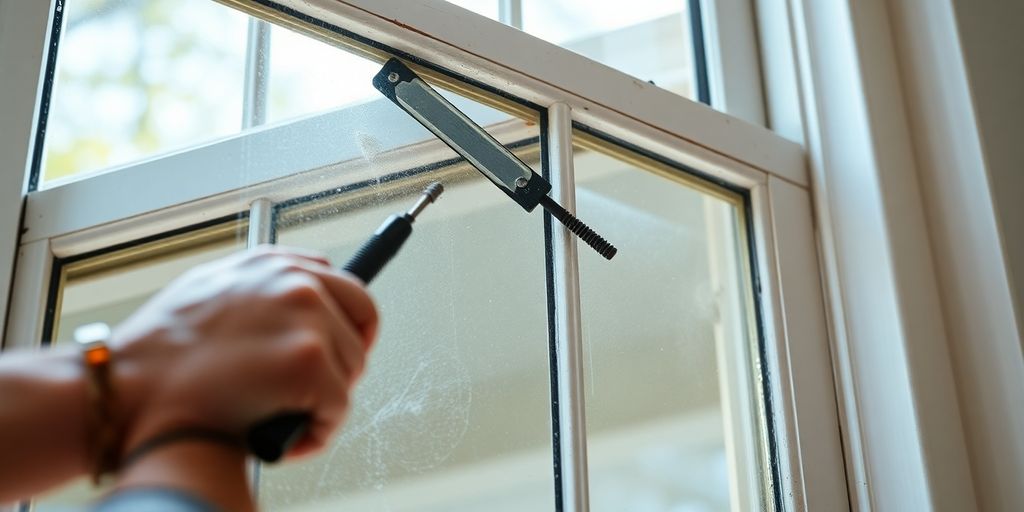
Cutting Through Caulking and Sealant
Once the sashes are out, it's time to cut through the caulking or sealant around the window frame. Use a utility knife to slice through the caulk, making sure to work slowly and steadily along all four sides of the frame. This helps to loosen the frame and prevent damage to the surrounding wall.
Detaching the Window Frame
With the caulking cut, you can now move on to removing the window frame itself. Use a pry bar to gently separate the frame from the wall. Start at one corner and work your way around, applying steady pressure. If the frame seems stuck, double-check for any remaining screws or nails that need to be removed.
If you're dealing with a particularly stubborn frame, consider using a heat gun to soften any adhesive. This can make the process a bit easier and prevent unnecessary damage.
Taking your time with each step not only ensures a safer removal process but also keeps the surrounding structure intact. Patience is key when handling older windows.
Handling Common Challenges During Window Removal
Dealing with Stubborn Frames
Sometimes, window frames just don't want to budge. It's like they're glued in place. Here's how to tackle those stubborn frames:
- Utility Knife: Start by cutting through any caulking or sealant with a utility knife. This can help loosen the frame from the wall.
- Pry Bar: Insert a pry bar gently into the seams and tap it lightly to loosen the frame. If it feels like you're wrestling a bear, don’t force it.
- Heat Gun: If all else fails, a heat gun can soften adhesives, making it easier to remove the frame.
Handling Broken Glass Safely
Broken glass is no joke. It can turn a simple project into a trip to the ER if you're not careful. Here's how to handle it:
- Protective Gear: Always wear gloves and goggles. You don’t want to be picking glass shards out of your fingers or eyes.
- Large Pieces First: Carefully remove any large pieces of glass. Don't rush it.
- Vacuum: Use a vacuum with a hose attachment to suck up smaller shards. A broom might just spread them around.
Addressing Structural Issues
Sometimes, the window frame isn’t the only problem. You might find issues lurking beneath:
- Inspect for Rot: Check for any signs of rot or decay around the window opening. If you spot any, it’s time to fix it.
- Repair or Replace: If the wood is damaged, repair or replace it before installing anything new.
- Professional Help: For extensive damage, consider calling in a pro. Better safe than sorry.
Taking your time and being cautious can save you from a lot of headaches during window removal. Stay patient and organized, and you'll get through it just fine.
By preparing for these challenges, you'll make the window removal process a whole lot smoother. Just remember, safety first!
Disposing of Old Window Materials Responsibly
Recycling Glass and Metal Parts
When you take down those old windows, don't just toss everything in the trash. Recycling is the way to go for glass and metal bits. Here's how you can do it right:
- Separate the materials: Keep glass, metal, and wood apart. This makes recycling way easier.
- Check local rules: Different places have their own recycling rules, especially for construction stuff.
- Find the right center: Look for a local recycling spot that takes window parts.
Proper Disposal of Wood Frames
Wood frames can be a bit tricky. Here's what you can do:
- Reuse: If the wood's still good, why not use it for another project?
- Compost: If it's untreated wood, it might be good for composting.
- Landfill: If there's no other choice, take it to a landfill that handles construction waste.
Cleaning Up the Work Area
After all the heavy lifting, don't forget to tidy up:
- Sweep up debris: Make sure no sharp bits are left lying around.
- Dispose of waste properly: Make sure everything goes to the right place, whether it's recycling or the landfill.
- Double-check the area: Make sure everything's clean and safe, especially if you've got kids or pets running around.
It's not just about getting rid of old stuff. Responsible disposal helps the planet and keeps your home improvement projects on the right track. And hey, if you're upgrading, consider using WRS Amesbury Block & Tackle Balances for smoother window operation in your next project.
Safety Tips for Removing Windows on Upper Floors
Using Ladders and Stabilizers Safely
Working on upper floors can be tricky, especially when dealing with windows. Using a ladder stabilizer is a must to keep your ladder steady and prevent any slips. Before you start, make sure your ladder is on a flat surface. A good rule to follow is placing the ladder base one foot away from the wall for every four feet of height. This helps keep things balanced while you work. Remember to double-check that everything's secure before climbing up.
Working with a Partner for Extra Safety
Teamwork isn't just for sports; it's crucial for safety too. Having a partner when you're up high can make a big difference. They can help hold the ladder, pass tools, or just be there to spot you. Plus, if anything goes wrong, you've got someone right there to help. Here’s why a partner is handy:
- They can help lift heavy window sashes.
- They're an extra set of eyes to catch any safety issues.
- They can assist in an emergency.
Ensuring Proper Ventilation
When you're dealing with old windows, dust and debris are part of the job. Ensuring good ventilation keeps the air fresh and reduces the risk of inhaling harmful particles. Open other windows or use fans to keep air moving. It's a simple step but can make a big difference in keeping the workspace safe and comfortable.
Safety first! Taking these precautions can help prevent accidents and make your window removal project on upper floors a lot smoother.
For those tackling non-tilt windows, the WRS Amesbury Block & Tackle Balance is a fantastic tool. It's designed for DIY folks looking to restore window functionality efficiently.
Wrapping It Up
So, there you have it! Taking out those old double-hung windows isn't as scary as it seems, right? Just remember to gear up with your gloves and goggles before diving in. Start by clearing the area and taking your time with each step. Carefully remove the sashes and then the frame, using your tools gently to avoid any mishaps. And hey, don't forget to clean up the leftover caulk and debris once you're done. If you're up on a ladder, make sure it's steady and maybe have a buddy around just in case. By following these steps, not only will your home look fresher, but you'll also be saving on energy. Happy renovating!
Frequently Asked Questions
What tools do I need to take out old double-hung windows?
You'll need a utility knife, a pry bar, a screwdriver, and safety gear like gloves and goggles.
How can I stay safe when removing windows from higher floors?
Use a ladder stabilizer and make sure the ladder is on a flat surface. It's also wise to have someone help you.
What should I do if I find damage around the window frame?
Carefully inspect the area. You may need to fix any rot or damage before putting in new windows.
Can I recycle the parts from my old windows?
Yes! You can recycle glass and metal pieces, and check with local services for how to dispose of wood frames properly.
What's the best way to clean the window opening after removal?
Use a scraper to remove leftover caulk or adhesive, and ensure the area is clean before installing new windows.
How can I prevent damaging the wall while removing the window?
Be gentle when using the pry bar to detach the frame and use the right tools to minimize any damage.