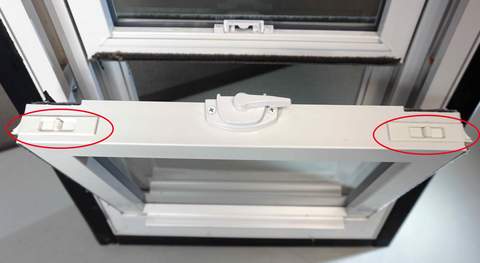
DIY Window Tilt Latch Replacement: A Step-by-Step Guide
Are you tired of your window tilt latch constantly slipping out of place, causing your window to unexpectedly tilt in? Look no further, because today, we're going to show you how to replace that pesky latch with a brand new one, in a step-by-step guide that's so simple, even a caveman could do it (assuming that caveman has a screwdriver and some basic hand-eye coordination).
Step 1:
Gather your materials. You'll need a new tilt latch, a screwdriver, a hammer, and a level of patience that borders on saintly. Oh, and a measuring tape, because you'll need to make sure the new latch is the right size for your window.
Step 2:
Remove the old latch. Using your trusty screwdriver, remove the screws that are holding the old latch in place. If the screws are stubborn, feel free to use a hammer to give them a gentle tap. Just be careful not to hit your fingers, or you'll be singing "My pinky finger hurts" for the rest of the day.

Step 3:
Measure the size of the old latch. Hold the old latch up to the new one and make sure they're the same size. If they're not, you may have to return the new latch and get one that's the right size. Or, you could just duct tape the new latch to the old one and hope for the best. (dont do that)
Step 4:
Install the new latch. Line up the new latch with the holes left by the old one and insert the screws. Tighten them firmly, but not too tightly, or you'll strip the threads. And nobody wants to deal with that.
Step 5:
Test the latch. Open and close the window a few times to make sure the new latch is working properly. If it is, congratulations! You've successfully replaced your window tilt latch. If it's not, well, maybe it's time to call in a professional.
Conclusion
And there you have it, folks! A simple and easy guide to replacing your window tilt latch. Just remember to take your time, measure twice, and hammer once. And most importantly, don't forget to make sure the new latch is the right size, or you'll be living with a window that won't stay closed for the rest of your life. Happy DIY-ing! For more information, contact us!

