Essential Guide to Window Sash Replacement: Tips for Homeowners
Replacing a window sash might sound like a big job, but it’s totally doable with some guidance. This article will help you understand everything about window sash replacement, from what a sash is to the tools you’ll need and the steps to follow. Whether you’re trying to fix drafts or just want to freshen up your windows, this guide will set you on the right path.
Key Takeaways
- A window sash is the part that holds the glass and allows the window to open and close.
- Common issues include drafts, difficulty in operation, and visible damage.
- Replacing a sash can boost your home's energy efficiency and curb appeal.
- Costs for sash replacement can range from $150 to $400 per window, based on materials and labor.
- DIY replacements are possible, but professionals can ensure a better fit and performance.
Understanding Window Sash Replacement
What Is a Window Sash?
Okay, so what exactly is a window sash? Simply put, it's the movable part of a window that holds the glass panes. Think of it as the window's 'insides' that you actually operate. It's what you slide up and down (in a double-hung window) or swing open (in a casement window). The sash is responsible for both the window's structural integrity and its ability to open and close properly. It's more than just a frame; it's a critical component for your window's function.
Importance of a Properly Functioning Sash
Why does a properly working sash matter? Well, for starters, it's about energy efficiency. A bad sash can lead to drafts, which means higher heating and cooling bills. It's also about ease of use. Nobody wants to struggle to open or close a window. A well-maintained sash ensures smooth operation. Plus, a good sash contributes to the overall security of your home. A damaged sash can compromise the window's locking mechanism, making it easier for intruders to get in. Replacing a window sash replacement kit can be a cheaper alternative than replacing the entire window.
Common Issues with Window Sashes
So, what can go wrong with a window sash? Plenty! Here are some common problems:
- Rot and Decay: Wood sashes are susceptible to rot, especially in damp climates. This can weaken the structure and lead to air leaks.
- Cracked or Broken Glass: Accidents happen, and glass can break. Replacing the entire sash might be easier than replacing just the glass.
- Sticking or Binding: Over time, sashes can become difficult to open or close due to swelling, warping, or paint buildup.
- Failed Seals: The seals around the glass can fail, leading to condensation between the panes and reduced insulation.
Ignoring these issues can lead to bigger problems down the road, like water damage to your walls or increased energy costs. Addressing sash problems early can save you money and headaches in the long run.
Choosing the Right Replacement Sash
Types of Window Sashes
Okay, so you're ready to replace a window sash. First things first, you gotta know what kind of sash you're dealing with. There are a few common types, and knowing the difference is key to getting the right replacement. You've got your single-hung and double-hung sashes, which are probably the most common. Single-hung means only the bottom sash moves, while double-hung means both the top and bottom can slide. Then there are casement windows, which crank open, and awning windows, which are hinged at the top. Make sure you identify the type you have before you even think about ordering anything. It's also worth noting that some sashes are designed with unique features, like tilt-in options for easier cleaning.
Material Considerations
When it comes to materials, you've got options, but they're not all created equal. Wood is classic and can be painted or stained to match your home's aesthetic, but it requires more maintenance. Vinyl is low-maintenance and energy-efficient, but it might not have the same look as wood. Aluminum is durable and weather-resistant, but it can be more expensive. Consider the climate you live in and how much upkeep you're willing to do. For example, if you live in a humid area, vinyl might be a better choice to avoid rot. Here's a quick rundown:
- Wood: Looks great, needs maintenance.
- Vinyl: Low maintenance, good insulation.
- Aluminum: Durable, can be pricey.
Choosing the right material is a balance between looks, cost, and how much work you want to put in down the road. Think about what matters most to you and go from there.
Sizing Your Replacement Sash
Alright, this is where things get real. Accurate measurements are absolutely crucial. If you mess this up, your new sash won't fit, and you'll be back to square one. Measure the height and width of the existing sash, and measure it in multiple places because windows aren't always perfectly square. Also, pay attention to the thickness of the sash. It's also a good idea to check the manufacturer's instructions for specific ordering guidelines. Here's a simple checklist:
- Measure the width at the top, middle, and bottom.
- Measure the height on both sides and in the middle.
- Measure the thickness of the sash.
- Double-check everything before ordering.
Tools and Materials Needed
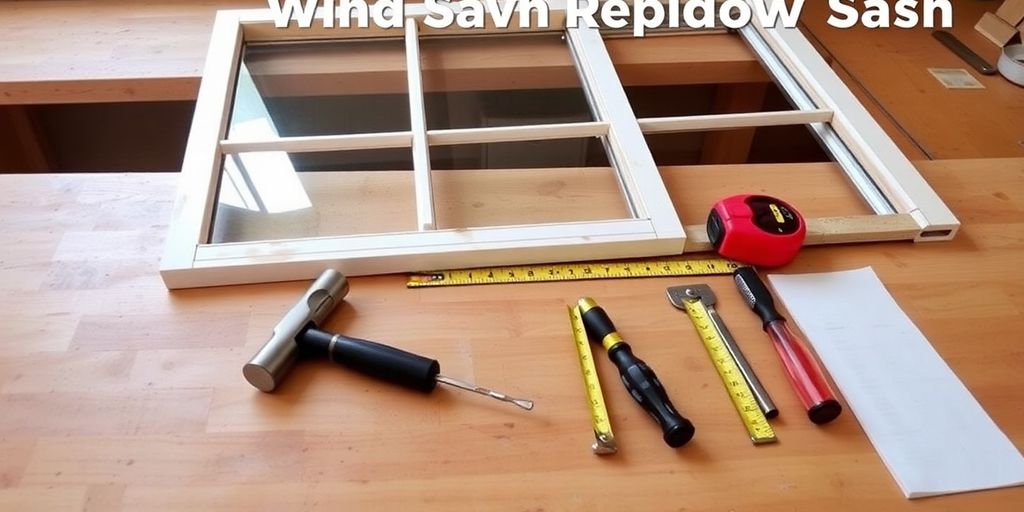
Alright, so you're ready to swap out that old window sash. Awesome! But before you start tearing things apart, let's make sure you've got all the right gear. Trust me, nothing's worse than getting halfway through a project and realizing you're missing something. I've been there, and it's not fun. So, let's get organized.
Essential Tools for Sash Replacement
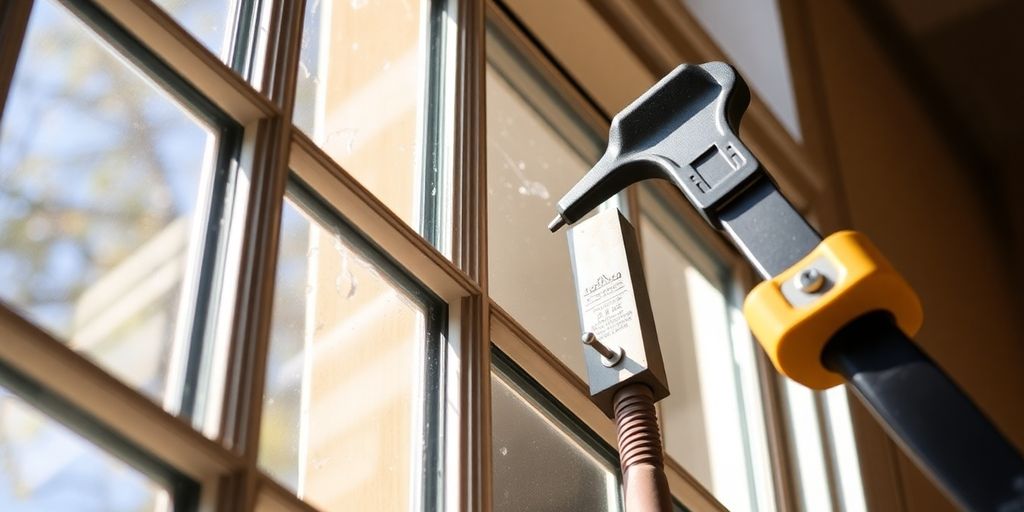
Okay, first up, the tools. You'll need a few basics, and maybe a couple of extras depending on how stubborn your old window is. Here's the rundown:
- Measuring tape: Accuracy is key here. You need to measure the window opening precisely to ensure your new sash fits perfectly. Don't eyeball it!
- Utility knife: For scoring paint or caulk. A sharp blade will make your life much easier.
- Putty knife: This is your go-to for gently prying things apart without causing too much damage. Be patient and work slowly.
- Screwdriver: Both Phillips and flathead might be needed, depending on the screws used in your window frame. A multi-bit screwdriver is a good investment.
- Hammer: For gently tapping things into place. Don't go overboard – you're not trying to demolish anything.
- Pry bar: For removing stubborn window stops. Be careful not to damage the surrounding wood.
Recommended Materials
Now, let's talk materials. Besides the obvious replacement sash, you'll need a few other things to ensure a smooth and weathertight installation. Getting the right replacement sash kit is important.
- Replacement sash: Obviously! Make sure it's the right size and material for your window.
- Caulk: A good quality exterior caulk is essential for sealing gaps and preventing drafts. Choose a paintable caulk if you plan to paint the window frame.
- Insulation: Foam backer rod or fiberglass insulation to fill any large gaps around the sash.
- Wood shims: For leveling and aligning the sash in the frame.
- Paint or stain: To match the existing window frame (optional).
Safety Gear for the Project
Safety first, always! Window work can be a bit risky, so don't skip on the safety gear. It's not worth getting hurt to save a few bucks.
- Safety glasses: Protect your eyes from flying debris. Seriously, wear them.
- Gloves: Protect your hands from sharp edges and splinters. Construction gloves with a good grip are ideal.
- Dust mask: Especially important if you're working with older windows that might have lead paint. Don't take chances with your health.
Remember, taking the time to gather the right tools and materials will make the whole process much smoother and safer. It's better to be prepared than to have to stop halfway through and run to the hardware store. Trust me, your future self will thank you.
Step-by-Step Process for Replacement
Removing the Old Sash
Okay, first things first, you gotta get that old sash outta there. This part can be a little tricky, especially if it's painted shut or has some old hardware holding it in place. Start by scoring the paint around the edges of the sash with a utility knife. This helps prevent peeling paint from damaging the surrounding trim. Then:
- Carefully remove any stops or parting beads that are holding the sash in place. These are usually thin strips of wood nailed or clipped into the window frame.
- If there are any cords or chains attached to weights, carefully detach them. Be prepared for the weights to drop, so keep your hands clear!
- Gently wiggle the sash free from the frame. You might need a flat pry bar to help loosen it, but be careful not to damage the wood.
Installing the New Sash
Alright, now for the fun part – putting in the new sash! Make sure you've got the right size replacement sash kit – double-check those measurements before you start. Here's the lowdown:
- Position the new sash into the window opening. It should fit snugly but not too tightly. If it's too tight, you might need to do a little sanding or trimming.
- Attach any cords or chains to the weights, making sure they're properly aligned and functioning smoothly. New balances might be needed.
- Secure the sash in place with new stops or parting beads. Nail them in carefully, making sure they're flush with the frame.
Sealing and Insulating the Sash
Don't skip this step! Sealing and insulating are super important for keeping out drafts and saving energy. Here's what you need to do:
- Apply a bead of caulk around the exterior of the sash where it meets the window frame. This will help seal out air and moisture.
- Install weather stripping around the sash to create a tight seal. There are different types of weather stripping available, so choose one that's appropriate for your window type.
- Check for any gaps or cracks around the window frame and fill them with insulating foam. This will help prevent air leaks and improve energy efficiency.
Remember, taking your time and paying attention to detail will result in a better-performing and longer-lasting window sash replacement. Don't rush the process, and don't be afraid to ask for help if you get stuck.
Cost Considerations for Window Sash Replacement
Average Costs of Replacement
Okay, let's talk money. Figuring out the cost of window sash replacement can be tricky because it depends on a bunch of things. Generally, you're looking at somewhere between $150 and $650 per window for the sash itself. But that's just a starting point. Labor costs can add a significant chunk to that, especially if you're not the DIY type. Keep in mind that these are just averages, and your actual costs could be higher or lower.
Factors Affecting Price
So, what makes the price jump around so much? Here's a quick rundown:
- Window size: Bigger windows mean bigger sashes, which means more materials and higher costs.
- Material: Vinyl is usually the cheapest option, while wood can get pretty expensive, especially if you're going for a fancy type of wood.
- Window type: Single-hung, double-hung, casement – they all have different sash designs, which affects the price.
- Complexity of the job: If your old sash is stuck or the frame is damaged, it's going to take more time and effort to replace, which means higher labor costs.
It's a good idea to get quotes from a few different contractors before making a decision. Make sure they break down the costs so you can see exactly what you're paying for. Don't be afraid to ask questions and negotiate.
DIY vs. Professional Installation Costs
Alright, the big question: should you do it yourself or hire a pro? DIY can save you money on labor costs, but it's not always the best option. If you're comfortable with tools and have some experience with home repairs, then go for it. But if you're not sure what you're doing, you could end up making things worse and costing yourself more money in the long run. Professional window contractor labor can range from $50 to $150 per hour.
Here's a quick comparison:
| Factor | DIY | Professional |
|---|---|---|
| Cost | Lower upfront cost | Higher upfront cost |
| Time | Can take longer, especially if inexperienced | Usually faster |
| Skill | Requires some DIY skills | Requires hiring a qualified professional |
| Risk | Potential for mistakes and damage | Lower risk of mistakes and damage |
| Warranty/Guarantee | No warranty | Often comes with a warranty or guarantee |
Tips for a Successful Replacement
Double-Check Measurements
Before you even think about ordering that replacement sash, triple-check your measurements. Seriously. I can't stress this enough. A window sash that's even slightly off will cause you a world of pain. Measure the height and width at the top, middle, and bottom of the window opening. If those measurements aren't consistent, you'll need to figure out the smallest dimension to ensure the sash fits. It's better to have a tiny gap you can fill with caulk than a sash that simply won't go in.
Use Quality Materials
Don't skimp on the materials. I know it's tempting to save a few bucks, but trust me, it's not worth it in the long run. A cheap sash replacement kit might look okay at first, but it'll likely warp, crack, or fall apart much sooner than a higher-quality one. Invest in a good sash made from durable materials like solid wood or high-quality vinyl. It'll save you money and headaches down the road. Plus, better materials often mean better insulation, which can help lower your energy bills.
Seek Professional Advice When Needed
Look, I'm all for DIY projects, but sometimes you just need to admit when you're in over your head. If you're not comfortable with any part of the sash replacement process, don't hesitate to call in a pro. It's better to spend a little extra money on professional installation than to botch the job and end up with a leaky, drafty window. Plus, a professional can often spot potential problems that you might miss, like a damaged window frame or rotted sill. They can also ensure that the weatherstripping makes good contact all around.
Taking your time and working carefully will lead to a more professional-looking installation. Rushing can result in mistakes that may be costly to fix.
Maintaining Your New Window Sash
Regular Maintenance Practices
Okay, so you've got your new window sash installed – awesome! Now, let's talk about keeping it in tip-top shape. Regular maintenance is key to extending its life and ensuring it functions smoothly. Think of it like this: a little effort now saves you from bigger headaches (and expenses) later.
- Clean Regularly: Wipe down your sashes with a damp cloth every few months to remove dust, dirt, and grime. This prevents buildup that can interfere with operation.
- Inspect Hardware: Check the locks, latches, and balances periodically. Make sure they're secure and functioning correctly. Tighten any loose screws.
- Lubricate Moving Parts: Apply a silicone-based lubricant to the moving parts of your sash, like the balances and hinges. This keeps them moving smoothly and prevents sticking. You can find a good silicone lubricant at most hardware stores.
Signs of Wear and Tear
Even with the best maintenance, wear and tear is inevitable. Knowing what to look for can help you catch problems early and prevent them from escalating. Here are some common signs to watch out for:
- Drafts: Feeling a draft around your window? This could indicate worn or damaged weatherstripping. Replace it promptly to maintain energy efficiency.
- Sticking or Binding: If your sash is difficult to open or close, it could be a sign of warped wood, damaged balances, or debris in the tracks. Address the issue before it causes further damage.
- Visible Damage: Cracks, chips, or rot on the sash itself are clear signs of wear and tear. Repair or replace damaged components as needed.
When to Consider Replacement Again
Okay, so when is it time to throw in the towel and replace the sash again? Well, even with diligent maintenance, a window sash won't last forever. Here are some indicators that it might be time for a replacement:
- Extensive Damage: If the sash has significant rot, cracks, or warping that can't be easily repaired, replacement is the best option.
- Persistent Drafts: If you've replaced the weatherstripping and are still experiencing drafts, the sash itself may be the problem. Warping or damage can create gaps that are difficult to seal.
- Difficulty Operating: If the sash is consistently difficult to open or close, despite lubrication and minor repairs, the balances or other components may be worn beyond repair. Consider a window sash replacement at this point.
Regularly inspect your window sashes for any signs of damage or wear. Addressing minor issues promptly can prevent them from escalating into more costly repairs or replacements down the road. A little preventative care can go a long way in extending the life of your windows.
Wrapping It Up
So, there you have it! Replacing your window sash might seem like a big deal, but it’s totally doable if you take it step by step. Remember to measure twice, choose good materials, and don’t rush through the process. If you hit a snag, don’t hesitate to reach out for help or watch some tutorials. And hey, if you’re not feeling confident, getting a pro to do it can save you a lot of headaches later. With a little effort, you’ll have windows that not only look great but also work better. Happy fixing!
Frequently Asked Questions
What is a window sash?
A window sash is the part of the window that holds the glass in place and allows the window to open and close.
Why should I replace my window sash?
You might want to replace your window sash to fix drafts, improve energy efficiency, or update the look of your window.
Can I replace just the sash and not the whole window?
Yes, if the frame is still in good shape, you can just replace the sash. This is often cheaper than replacing the entire window.
How long does it take to replace a window sash?
For a professional, it usually takes about 1 to 2 hours per window. If you're doing it yourself, it might take longer depending on your skill level.
Is it worth it to replace my window sash?
Yes! Replacing your window sash can save you money on energy bills, make your home more secure, and increase its value.
What tools do I need for sash replacement?
You'll need basic tools like a screwdriver, a utility knife, and possibly a level. Safety gear like gloves and goggles is also important.