Mastering the Art of Home Repair: How to Caulk with Confidence
If you've ever felt a draft sneaking through your windows or noticed water stains forming, it's time to learn how to caulk. Caulking is a straightforward yet essential skill for any homeowner. By sealing gaps and cracks around your windows, you not only enhance your home's comfort but also boost its energy efficiency. In this guide, we'll walk you through the entire caulking process, from understanding its importance to maintaining your newly caulked windows. Let's get started!
Key Takeaways
- Caulking prevents drafts and water leaks, keeping your home cozy.
- Always prepare your surfaces by cleaning and removing old caulk.
- Use a caulking gun for an even application and a steady hand.
- Avoid common mistakes like cutting the tube wrong or rushing the curing time.
- Regular maintenance of your caulk can save you from costly repairs.
Understanding The Basics Of Window Caulking
Why Caulking Is Essential For Windows
Okay, so why bother with window caulking anyway? Well, think of it as a shield for your house. Caulking fills those little gaps around your windows, and that's super important. Without it, you're basically inviting drafts, leaks, and even bugs into your cozy home. It's not just about comfort either; it's about saving money. All that air escaping? That's your hard-earned cash flying out the window (literally!). Plus, water damage is a real headache, and caulking helps keep that at bay. It's a small job that makes a big difference.
Common Problems Caulking Can Prevent
So, what happens if you skip the caulking? Here's a taste of the fun:
- Drafty rooms that are impossible to heat or cool. Seriously, who wants to wear a sweater indoors?
- Water leaks that can lead to mold and rot. Mold is not your friend.
- Insect invasions. Nobody wants uninvited guests, especially the creepy-crawly kind.
Ignoring those little gaps can lead to bigger, more expensive problems down the road. Regular caulking is like a cheap insurance policy for your home.
The Role Of Caulking In Energy Efficiency
Think of your house as a thermos. You want to keep the hot stuff hot and the cold stuff cold, right? Caulking plays a huge role in that. By sealing those gaps, it prevents air from leaking in or out. This means your heating and cooling systems don't have to work as hard, which saves you energy and money. It's a win-win! Plus, a well-sealed house is just more comfortable. No more drafty windows in the winter or sweltering rooms in the summer. It's all about creating a consistent, comfortable environment.
Preparing Your Window Pane For Caulking
Gathering Necessary Tools And Materials
Before you start slapping caulk everywhere, you gotta get your stuff together. It's like cooking; you don't want to be halfway through and realize you're missing an ingredient. Here's what I usually grab:
- Caulk gun: Obviously, you can't caulk without one. Get a decent one; the cheap ones are a pain.
- Utility knife or caulk remover: For getting rid of the old, crusty caulk. Trust me, you'll need it.
- Damp cloth or sponge: To wipe away dust and grime. A clean surface is key.
- Masking tape: This is optional, but it helps keep things neat and tidy. I'm all about neat and tidy.
- Caulk: Duh. Make sure you get the right kind for windows. I'll talk about that later.
Cleaning And Prepping The Surface
Okay, so you've got your tools. Now, let's get that window ready. This is probably the most important step, so don't skip it. You can't just slap caulk on a dirty surface and expect it to stick. Here's what I do:
- Scrape off any old caulk with your utility knife or caulk remover. Be careful not to scratch the window or frame.
- Wipe down the entire area with a damp cloth or sponge. Get rid of all the dust, dirt, and grime. If it's really dirty, use some soap and water.
- Let the area dry completely. Caulk doesn't stick well to wet surfaces.
- Apply masking tape along the edges of the window and frame. This will give you a nice, clean line.
Prepping the surface is like laying the foundation for a house. If the foundation is bad, the whole house will crumble. Same goes for caulking. Take your time and do it right.
Safety Precautions Before You Start
Alright, before you dive headfirst into this project, let's talk safety. Caulking isn't exactly rocket science, but you still need to be careful. Here are a few things to keep in mind:
- Wear gloves: Caulk can be messy, and some types can irritate your skin. Gloves are your friend.
- Work in a well-ventilated area: Some caulk can have strong fumes. Open a window or turn on a fan.
- Be careful with the utility knife: Those things are sharp! Don't cut yourself.
- Read the instructions on the caulk tube: Each type of caulk is different, so make sure you know what you're doing. For instance, using beige top jamb weatherstripping can help with insulation.
Step-By-Step Guide To Caulking A Window Pane
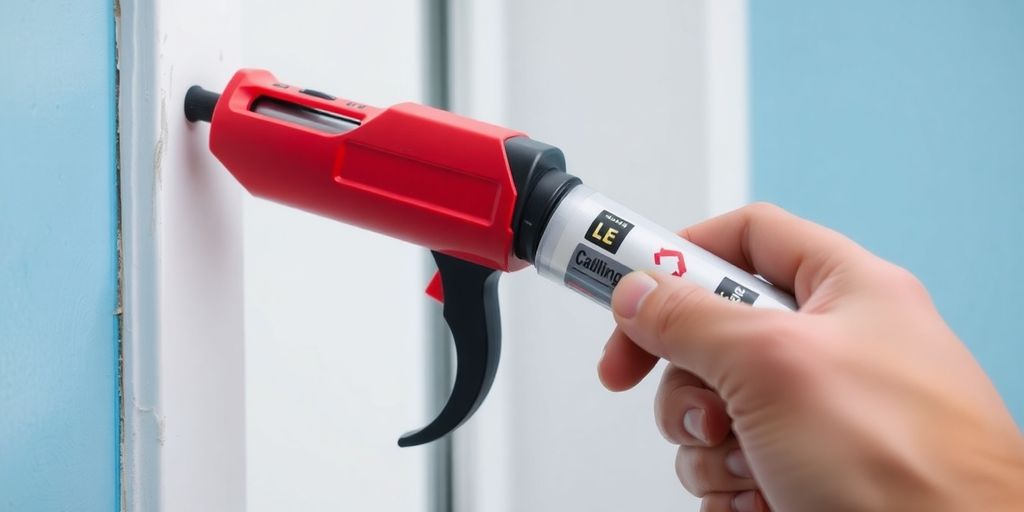
Loading The Caulking Gun
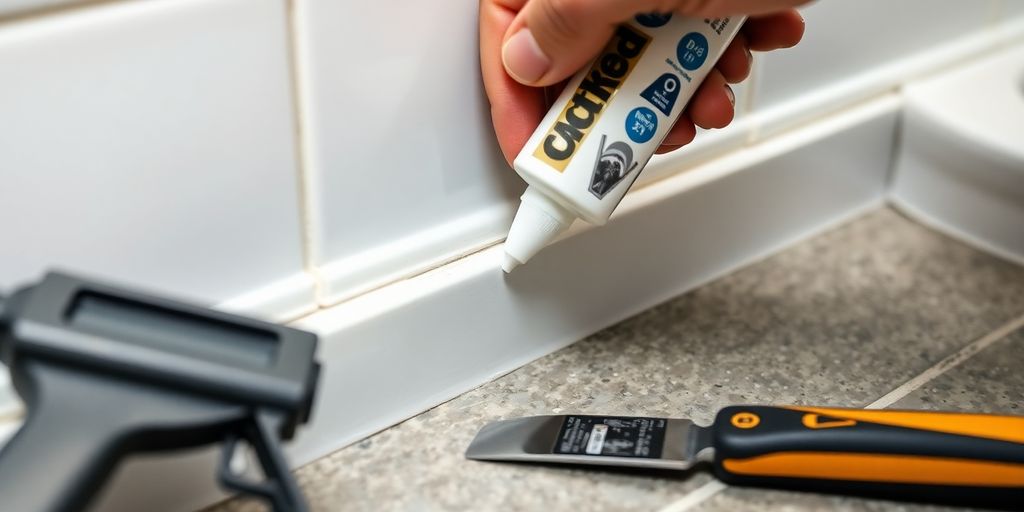
Okay, first things first, you gotta load up your caulking gun. It's not rocket science, but doing it right makes the whole process smoother. Pull back the plunger all the way. Then, pop your caulk tube in there, nozzle-end first. Give it a good push so it's snug. Next, you'll need to cut the tip of the nozzle at a 45-degree angle. The size of the opening depends on how wide you want your bead of caulk to be. I usually start small; you can always cut more off if you need to. Finally, puncture the seal inside the nozzle with something like a nail or wire. Now you're ready to rock and roll!
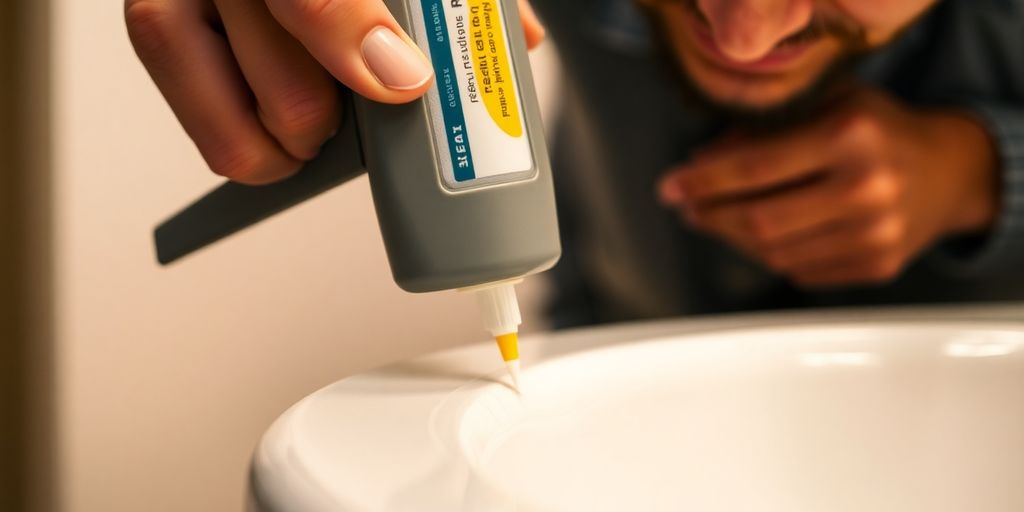
Applying The Caulk Smoothly And Evenly
Alright, here's where the magic happens. Place the tip of the nozzle where you want to start caulking. Hold the gun at a consistent angle – usually around 45 degrees works well. Squeeze the trigger gently and move the gun along the seam in a smooth, steady motion. The key is to maintain even pressure on the trigger and keep the gun moving at a consistent speed. Don't try to lay down too much caulk at once; it's better to go back and add more if needed than to have a big, gloppy mess. Overlap your strokes slightly to ensure there are no gaps. If you mess up, don't sweat it! Just wipe it away with a damp cloth and try again.
Techniques For A Professional Finish
So, you've laid down your bead of caulk, but it looks a little rough, right? No worries, here's how to make it look like a pro did it. The easiest way is to use a caulking tool. Dip the tool in water with a bit of dish soap to prevent sticking, then run it along the bead of caulk in one smooth motion. This will create a nice, concave finish. If you don't have a caulking tool, your finger works just as well! Just wet your finger with soapy water and run it along the caulk. Keep a damp cloth handy to wipe off any excess caulk from your finger or the tool. For corners, use a small, pointed tool or your finger to create a clean, sharp edge. And remember, patience is key! Don't rush it, and take your time to smooth out any imperfections. If you want to avoid Cloudflare errors, make sure your internet connection is stable during the process.
Taking your time with each step can save you from having to redo the whole thing later. It's all about precision and patience in this game.
Common Mistakes To Avoid When Caulking
Cutting The Caulk Tube Incorrectly
Okay, so you've got your caulk gun loaded and you're ready to go. But hold up! How did you cut the tip of that tube? Cutting the tip at the wrong angle or too high up is a super common mistake. If you make the opening too big, you'll end up with way too much caulk coming out, and it'll be a total mess. Aim for a small, 45-degree angle cut. This gives you way better control over the caulk bead and helps you get a nice, clean line. Trust me, a little precision here goes a long way.
Ignoring Cure Time And Conditions
So, you've laid down your bead of caulk, and it looks pretty good. Now what? Well, you can't just forget about it! Ignoring the cure time is a big no-no. Most caulks need time to fully dry and set properly. Check the manufacturer's instructions for the recommended cure time – it could be a few hours or even a couple of days. Also, pay attention to the conditions. Don't caulk when it's super humid or freezing cold, as this can mess with the curing process.
Rushing the curing process can ruin your hard work. Make sure you give the caulk enough time to set properly. This might take anywhere from a few hours to a couple of days, depending on the type.
Not Using Masking Tape
Alright, let's talk about masking tape. Some people skip this step, thinking they can just freehand it. But honestly, unless you're a caulking pro, you're probably going to end up with some messy edges. Masking tape is your friend! Apply it along both sides of the area you're caulking, leaving a small gap for the caulk. Once you've applied the caulk and smoothed it out, carefully peel away the tape. You'll be left with a super clean, professional-looking line. Here's why it's important:
- It helps create a straight, even line.
- It protects the surrounding surfaces from excess caulk.
- It makes cleanup way easier.
Enhancing Your Home With Caulking
Using Caulk As A Design Element
Caulking isn't just for sealing gaps anymore; it can actually be a cool design tool. Think of caulk as a paintbrush for your windows. You can pick different colors and textures to either blend in with your window frames or make them stand out. It's all about getting creative. Here's how you can use caulk in a fun way:
- Color Matching: Find a caulk color that's the same as your window frames for a smooth look. Try it out in a hidden spot first to make sure the color looks good when it dries. You can find a caulk color that matches your style.
- Bead Styles: Play around with different bead styles, like making them curved in or out, to add some texture.
- Layering: Put on a few layers of caulk to make it look more noticeable.
Transitioning Spaces With Caulk
Caulk can be super useful for making smooth transitions between different materials. For example:
- Where wood meets tile, caulk can create a clean, waterproof seal that looks nice.
- It can also help blend different textures, making the whole area look more put-together.
- This is especially helpful in places like bathrooms or kitchens where you have different materials coming together.
Subtle Highlights In Architecture
Caulk can also be used to highlight certain parts of your home's architecture. It's all about being subtle and adding little touches of elegance. You can use caulk to:
- Emphasize the lines of your windows or doors.
- Create a shadow effect that adds depth.
- Draw attention to unique architectural details that you want to show off. You can use architectural features to your advantage.
Don't underestimate what caulk can do for your home improvement projects. With a little bit of creativity, caulking can be more than just functional; it can become a key part of your home's design.
Maintaining Your Caulked Window Pane
How To Inspect Caulking For Damage
Okay, so you've caulked your windows, great! But it's not a set-it-and-forget-it kind of deal. You gotta keep an eye on things to make sure your window caulking is still doing its job. Regular inspections are key to preventing bigger problems down the road.
- Visually check for cracks or gaps. Seriously, just look closely.
- Press along the caulk line. If it feels hard or brittle, it's probably time to replace it.
- Look for discoloration. This could mean mold or mildew is growing, which is a no-no.
Ignoring small issues with your caulking can lead to bigger problems like water damage and energy loss. A little bit of maintenance can save you a lot of hassle later on.
Tips For Long-Lasting Caulking
Want your caulking to last? Of course, you do! Here are some things I've learned over the years:
- Use the right caulk. Seriously, don't just grab whatever's cheapest. Different caulks are made for different things. For example, using beige top jamb weatherstripping for a snug fit can help with insulation.
- Clean your caulking regularly. A little soap and water can go a long way in preventing dirt buildup.
- Keep an eye on humidity levels. High humidity can make caulk break down faster. A dehumidifier might be a good investment if you live in a humid area.
Storing Caulk Properly
Believe it or not, how you store your caulk can affect how long it lasts.
- Seal opened tubes tightly. You can use a nail or screw to plug the nozzle.
- Store caulk in a cool, dry place. Extreme temperatures can mess with the caulk's consistency.
- Consider using a caulk saver cap. These little gadgets help prevent the caulk from drying out in the tube.
Wrapping It Up
So there you have it! Caulking might seem like a small task, but it can really make a difference in keeping your home comfy and energy-efficient. Just remember to take your time and don’t rush through it. With a bit of practice, you’ll be caulking like a pro in no time. If things don’t go perfectly, don’t sweat it—just scrape it off and give it another shot. It’s a handy skill to have, and once you get the hang of it, you might even find it kind of fun. So grab that caulk gun and get to work. Happy caulking!
Frequently Asked Questions
What is caulking and why is it important for windows?
Caulking is a material used to fill gaps and cracks around windows. It's important because it helps keep your home warm and dry by preventing drafts and water leaks.
How do I prepare my window for caulking?
Before caulking, clean the area around the window to remove dust and old caulk. Make sure the surface is dry for the best seal.
What tools do I need for caulking?
You'll need a caulking gun, caulk, a utility knife, a damp cloth, and possibly masking tape to keep the caulk neat.
How long does caulk take to dry?
Drying times can vary, but usually, you should wait a few hours to a couple of days before touching or painting over the caulk.
Can I caulk in any weather?
It's best to caulk when the weather is dry and mild. Extreme temperatures or rain can affect how well the caulk sticks.
What should I do if my caulking starts to crack?
If your caulking cracks, you should remove the old caulk and reapply a fresh layer to ensure a proper seal.