
S152 Series Screw-In Constant Force Balance Assembly & Installation
PLEASE NOTE: These instructions work with Single, Tandem or Triple Screw-In Constant Force Balances. Can be used for multiple different Constant Force Balance Series.
Assembly Instructions:

Step 1: Line up the top coil with the bottom coil. You may need to bend the top coil out so it will stay aligned.

Step 2: Once the coil holes are lined up with the hole on the pivot lock shoe, slip the screw in the hole to hold the coils in place.

Step 3: Install the screw through the pivot lock shoe. (NOTE: The Screw shown is too large, we did not have the correct screw size, but made it work for this. The recommended screw size is a #6 X ¾ or ½ ”)

Step 4: Once the coils are installed with the shoe, the next step is to fit the housing around the coils.

Installation Instructions:
Step 5: Put the screw through the hole on the front of the balance cover, and reinstall the balance where the original old was screwed into the jamb

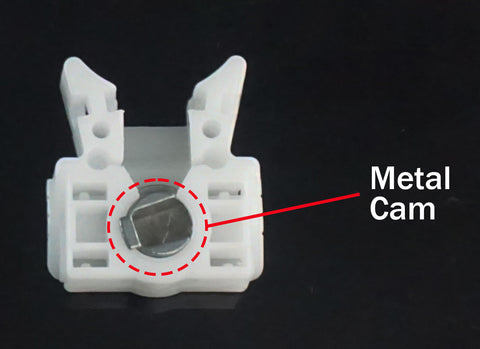
Step 6: Get a flathead screwdriver, insert into metal cam and pull down 6 to 8 inches, then turn the metal cam to lock. Repeat steps 1-5 for both balances on both sides of the window before reinstalling the sash.
Step 7: Hold the sash at an angle towards you, maneuver the left and right sides one at a time to get the pivot bars back into the cam of the pivot lock shoe. Make sure that the sash is level before tilting inward and snapping the sash back into place, then gently lower and close the sash.
Step 8: Carefully test your balances by slowly lowering and raising the sash a few times to make sure it has smooth function and then lock your sash.
Conclusion:
If you encounter any issues or if the window does not operate correctly, feel free to contact the WHD Team! Our team of experts will be more than happy to assist you.