Top Tips for Installing Window Weather Stripping
Installing window weather stripping is a great way to keep your home cozy and energy-efficient. Weather stripping helps seal gaps around windows, preventing drafts and keeping the elements out. This guide will walk you through the top types of window weather stripping and how to install them effectively.
Key Takeaways
- Properly installed weather stripping can significantly reduce energy costs by sealing drafts.
- Always clean the surface before applying any weather stripping to ensure it adheres properly.
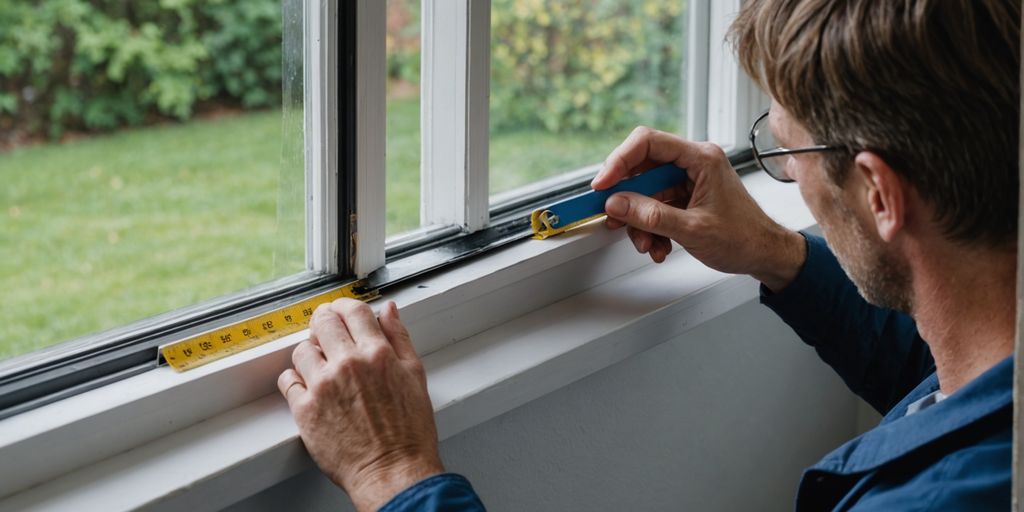
- Measure the area accurately and cut the weather stripping to fit snugly for the best results.
- Different types of weather stripping, like door sweeps and adhesive-backed foam, have specific installation methods.
- Regularly check and replace weather stripping to maintain an effective seal over time.
1. Door Sweeps
Door sweeps are essential for sealing the gap at the bottom of exterior doors, preventing drafts, dust, and insects from entering your home. Installing a door sweep is a simple and effective way to enhance your home's energy efficiency. Here’s a step-by-step guide to help you install a door sweep correctly:
- Inspect and Clean: Start by inspecting the doorstop and jamb for any gaps or holes. Clean the area thoroughly using mild detergent and water. Remove any old weather stripping and adhesive.
- Measure and Cut: Measure the width of your door and cut the door sweep to fit if necessary. Ensure the sweep’s rubber gasket seals tightly against the threshold.
- Position and Mark: With the door closed, position the sweep at the bottom of the door. Mark where to drill holes for the supplied screws.
- Pre-drill Holes: Pre-drill the holes to prevent the screws from cracking the door. Make the holes one size smaller than the screws.
- Attach the Sweep: Secure the sweep to the door using screws. Ensure it doesn’t interfere with the door’s operation.
A well-installed door sweep can significantly reduce energy loss and improve comfort in your home.
For those using a wrs grey vinyl storm door sweep, it measures 9/16" x 37" and is designed for superior insulation and durability. This type of sweep is easy to install and adaptable to various door types, enhancing energy efficiency while providing a sleek look.
2. Adhesive-Backed Foam
Adhesive-backed foam is one of the easiest and most affordable types of weather stripping to install. It is available in both rubber and plastic forms and comes in rolls of different lengths and thicknesses. When compressed by a door or window, the foam effectively seals out air, making it a great option for improving energy efficiency.
Steps to Install Adhesive-Backed Foam
- Choose a warm day for installation, ideally when the temperature is at least 60°F. This helps the adhesive form a better bond.
- Clean the surface where the foam will be applied using detergent and water. Make sure there is no dirt or grease left. If there is old adhesive, use petroleum jelly to remove it.
- Cut the foam strip to the required length using scissors, but don't remove the backing paper yet.
- Starting at one end, slowly peel off the paper backing while pressing the sticky foam strip into place. If the backing is stubborn, stretch the foam until the seal between the backing and foam breaks.
- Attach the strips to the doorjamb on the hinge side. If the door catches the weather stripping when you close it, trim the top piece of foam on the hinge side.
Adhesive-backed foam is not permanent but can last from one to three years. It also provides a cushioning effect that silences slamming doors.
Tools You'll Need
- Dish detergent
- Clean rags
- Petroleum jelly
- Scissors
3. Vinyl V Strips
Vinyl V strips are a popular choice for weatherproofing windows and doors. They are made of durable vinyl and are designed to fit into the grooves between a door or window and its frame. Vinyl V strips are effective at sealing gaps and preventing drafts.
Installation Steps
- Measure the Channel: Open the lower sash of your window all the way and measure the channel from the bottom of the sash to the bottom of the channel. Repeat this for the upper sash.
- Cut the Strip: Use a utility knife to cut the vinyl V strip to the correct length based on your measurements.
- Peel and Stick: Peel away the backing from the strip and push it into place in the channel. When the sashes are closed, both sides of the V are pushed together, forming an airtight seal.
Vinyl V strips are a cost-effective and easy-to-install solution for improving the energy efficiency of your home. They are especially useful for older windows that may have developed gaps over time.
4. Felt Weather Stripping
Felt weather stripping is a classic and budget-friendly option for sealing gaps around windows and doors. It comes in various widths, thicknesses, and colors like brown, gray, and black. Felt is one of the most economical choices for weather stripping, but it typically lasts only a year or two.
Felt strips are ideal for areas that don't see a lot of use, such as spare rooms. They can be nailed in place or come with a pressure-sensitive adhesive backing. To install felt weather stripping, follow these steps:
- Measure and cut the felt to fit the window or door. Remember, felt can go around corners.
- Nail the ends of each strip first, but don't drive the nails flush. Leave some room to pry them out if needed.
- Start at one end and drive a tack every 2 to 3 inches, pulling the felt tight as you go. If you find slack at the other end, remove the nail, pull to tighten, and trim any excess.
Felt weather stripping is best used for interior doors and windows that don't get opened often. For exterior doors and main windows, consider more durable options like foam or rubber weather stripping.
Felt weather stripping is a great choice for those looking to weather seal windows without breaking the bank. It's also a good option for window screen repair parts and other minor repairs. However, for high-traffic areas, you might want to explore other materials like foam-filled gaskets or spring-metal strips.
5. Spring-Metal Strips
Spring-metal strips are a popular choice for weather stripping due to their durability and effectiveness. These strips come in various finishes such as bronze, copper, stainless steel, and aluminum. They are typically sold in rolls and include the necessary brads for installation. Although installing spring-metal strips might seem straightforward, it requires some patience and precision.
Steps to Install Spring-Metal Strips
- Measure and Cut: Measure the length needed for your window or door and cut the spring-metal strips to size using tin snips. Make sure to account for any hardware like hinges or locks.
- Position the Strips: Place the strips so that the flared flange almost touches the door stop or window frame. Trim away any excess metal to fit around hardware.
- Initial Nailing: Tap in one nail at the top and one at the bottom of each strip. Do not drive these nails all the way in. If the strips do not have pre-punched holes, use an awl or ice pick to make pilot holes.
- Secure the Strips: Check to ensure the strips are straight and properly positioned. Drive a nail in the center of the strip, but only partway. Add more nails between the top and bottom, spacing them evenly. Use a nail set to drive the nails flush without damaging the strip.
- Flare the Edges: Use a screwdriver to flare out the edge of the strip, ensuring a snug fit.
Spring-metal weather stripping fits into the tracks around windows and doors, providing a tight seal against drafts, moisture, and noise. This makes it an excellent choice for enhancing energy efficiency in your home.
6. Tubular Gasket
Tubular gasket weather stripping is made from very flexible vinyl. It is usually applied outside where it easily conforms to uneven places. Available in white and gray, it cannot be painted because paint causes the tube to stiffen and lose its flexibility.
Benefits
- Flexible: Conforms to uneven surfaces easily.
- Durable: Made from sturdy vinyl material.
- Effective: Seals large and irregular gaps well.
Installation Tips
- Clean the surface where the gasket will be applied. Make sure it is smooth, clean, and dry.
- Measure the length needed and cut the gasket to size using scissors.
- Apply the gasket to the desired area, pressing firmly to ensure a good seal.
Tubular gaskets are a great choice for sealing large gaps around old doors and windows. They are flexible and durable, making them a reliable option for weatherproofing your home.
Important Note
Do not paint tubular gaskets. Painting can cause the material to stiffen and lose its flexibility, reducing its effectiveness.
For more weatherproofing options, consider looking into pgt window parts for additional solutions.
7. Foam-Filled Gasket
Foam-filled gaskets are a great option for sealing windows and doors. They have a foam core inside a flexible vinyl tube, which makes them strong and good at keeping out drafts. These gaskets are better at holding their shape compared to hollow-tube types.
Benefits
- Durability: The foam core adds strength, making the gasket last longer.
- Flexibility: The vinyl exterior can easily fit uneven surfaces.
- Insulation: The foam provides extra insulation, keeping your home warmer in winter and cooler in summer.
Installation Tips
- Measure the Area: Use a tape measure to find the length you need.
- Cut to Size: Cut the gasket to the right length with scissors.
- Clean the Surface: Make sure the area is clean and dry for better adhesion.
- Apply the Gasket: Press the gasket into place, making sure it fits snugly.
Foam-filled gaskets are a reliable choice for weatherproofing your home, offering both durability and flexibility.
8. Pressure-Sensitive Foam
Pressure-sensitive foam is one of the easiest and most affordable types of weather stripping to install. Available in both rubber and plastic, this adhesive-backed foam comes in rolls of different lengths and thicknesses. When compressed by a door or window, the foam seals out the air effectively. This type of weather stripping is ideal for filling large and uneven gaps.
Steps to Install Pressure-Sensitive Foam
- Choose a warm day: The adhesive forms a better bond if applied when the temperature is at least 60°F.
- Clean the surface: Use dish detergent and water to remove any dirt or grease. If old adhesive is present, use petroleum jelly to remove it. Dry the surface with clean rags.
- Cut the foam strip: Use scissors to cut the strip to the desired length, but don't remove the backing paper yet.
- Peel and stick: Starting at one end, slowly peel off the paper backing while pressing the sticky foam strip into place. If the backing is stubborn, stretch the foam until the seal between the backing and foam breaks.
- Attach to the doorjamb: For doors, attach the strips on the hinge side and the doorstop. If the door catches the weather stripping, trim the top piece of foam on the hinge side.
Pressure-sensitive foam is perfect for DIY enthusiasts and professionals alike. It provides a quick and effective solution for sealing drafts around doors and windows, ensuring a more comfortable and energy-efficient home.
9. Pressure-Sensitive Felt
Pressure-sensitive felt is a classic choice for weather stripping, known for its affordability and ease of use. It comes in various widths, thicknesses, and colors, such as brown, gray, and black. This type of felt has an adhesive backing, making it simple to apply without the need for nails or other fasteners.
What You'll Need
To install pressure-sensitive felt, gather the following tools:
- Tape measure
- Pencil
- Scissors
- Dish detergent
- Clean rags
Installation Steps
- Clean the Surface: Use dish detergent and clean rags to ensure the area where you'll apply the felt is free of dirt and grease.
- Measure and Cut: Measure the length needed and cut the felt to fit. Remember, felt can go around corners if needed.
- Apply the Felt: Peel off the backing and press the felt into place, starting at one end and working your way to the other.
Pressure-sensitive felt is a great option for sealing gaps around windows and doors, helping to reduce drafts and save on energy bills.
10. Self-Sticking Spring Metal
Self-sticking spring metal weather stripping is a convenient and effective way to seal gaps around windows and doors. This type of weather stripping is easier to install compared to traditional spring-metal strips. It comes with a peel-and-stick backing, making the installation process straightforward.
Steps to Install Self-Sticking Spring Metal
- Clean the Surface: Start by cleaning the area where the strips will be placed. Use dish detergent and clean rags to remove any dirt or grease.
- Measure and Cut: Measure the length needed and cut the strips to size using tin snips. Do not remove the backing paper yet.
- Position the Strips: Place the strips in position without removing the backing paper. Mark any spots that need trimming, such as around hardware or where vertical and horizontal strips meet.
- Peel and Stick: Begin peeling off the backing at one end and press the strip into place. Continue peeling and pressing as you work towards the other end.
- Flare the Edges: Use a screwdriver to flare out the edges of the strip for a snug fit.
Tools You'll Need
- Dish detergent
- Clean rags
- Tape measure
- Pencil
- Tin snips
- Screwdriver
Self-sticking spring metal is ideal for wood-framed windows and can be used in the same places as regular spring metal. It's a durable and easy-to-install solution for securing glass panes in window frames.
Conclusion
Installing window weather stripping is a simple yet effective way to keep your home cozy and energy-efficient. By following the steps outlined in this guide, you can easily seal gaps and prevent drafts. Remember to clean the surfaces, measure carefully, and choose the right type of weather stripping for your needs. Regularly check and replace worn-out strips to maintain a snug fit. With a little effort, you can enjoy a more comfortable home and lower energy bills all year round.
Frequently Asked Questions
What is weather stripping?
Weather stripping is a material used to seal gaps around doors and windows to prevent drafts, reduce energy loss, and improve comfort in your home.
How do I know if I need to replace my weather stripping?
You should replace weather stripping if you feel drafts, notice higher energy bills, or see visible wear and tear on the existing strips.
Can I install weather stripping myself?
Yes, many types of weather stripping are designed for easy DIY installation. Follow the instructions on the package for the best results.
What tools do I need to install weather stripping?
Common tools include a tape measure, scissors, a utility knife, and possibly a hammer and nails, depending on the type of weather stripping you choose.
How long does weather stripping last?
Weather stripping typically lasts a few years, but this can vary based on the material and exposure to the elements. Check it regularly and replace as needed.
What types of weather stripping are available?
There are various types, including adhesive-backed foam, vinyl V strips, felt, tubular gaskets, and spring-metal strips. Each type has its own pros and cons.